Here’s a quick-tip/full tutorial about an image processing technique that’s both versatile and powerful- and it only takes a few clicks! Like so many features in Photoshop, the software does the heavy lifting for us… we just need to know where to click to get it going. So let’s dig in…
- SUMMARY:
Image stacking, or just “stacking”, is actually a pretty broad term that means taking multiple images and, one way or another, combining them. This tutorial focuses on stacking to extend the duration of your capture, resulting in a long exposure / slow shutter image. I’ll run through it click-by-click in Photoshop (and you’ll be surprised how easy it is!), as well as how to do it manually- so users of other programs can still easily use this technique. I’ll run through a couple of the pro’s and con’s of stacking a long exposure, and finally I will glance over a couple alternate uses of stacking to maybe help spark some creativity and further exploration…
- Preamble (applications and use-case scenario)
If you already know when and why this is useful feel free to skip to Part I.
If you just want bullet-points without the blah-blah, skip way ahead and get on with your day…
If you’re reading this, chances are you love getting out and capturing. Me too! And if you’re like me, some of the greatest satisfaction in shooting comes from getting the image you want, exactly as you want it, IN CAMERA. When the shutter snaps closed and the LCD lights up, and you see your creative vision has come to life… truly awesome.
Unfortunately, it’s not always practical- or even possible- to shoot a scene exactly as you’d like. In a recent Waterfall Workshop I organized, we were extremely fortunate with great weather… but that also meant bright BRIGHT sun and a super well-lit waterfall. To get that silky, dreamy waterfall look most of us wanted, we were shooting at the lowest ISO setting available, and stopping our apertures down all the way… around f/22 for most of us.
Here’s the trouble- it was SO bright, we were still not able to get slow enough shutter speeds to create the motion blur that really captures what is happening in the scene (rather than a fast shutter, which freezes time and stops motion). AND! What if- creatively- we didn’t want to shoot at f/22+??? What if we wanted a more shallow depth of field, with foreground or background blur? Not to mention lenses lose sharpness at the extreme ends of their aperture range, as well as adding vignetting (darker image around the corners).
To create the image we aspired to capture, IN CAMERA, we needed to let less light in. We talked about using “Neutral Density” filters that block some of the light, like sunglasses for your camera. Then we actually held sunglasses in front of our lens and could immediately see we were getting more motion blur due to the slower shutter speed. While fun- holding sunglasses over your lens is a hack move if you’re primary focus is creating sharp, ultra high quality images. So… then everyone needs to buy filters for their lenses… right?
Maybe yes, maybe no… Here’s an alternative solution, with some powerful added benefits! Check out the full pro’s and con’s list at the end of this article for more about stacking vs ND filters
- Part I: Shooting
Frame your shot as you want it, and set your exposure settings as you want them. Even though we’re going to stack images to accomplish a long exposure, shooting with a slower shutter, using a tripod, and triggering the shutter with a remote, will all make things go smoother later.
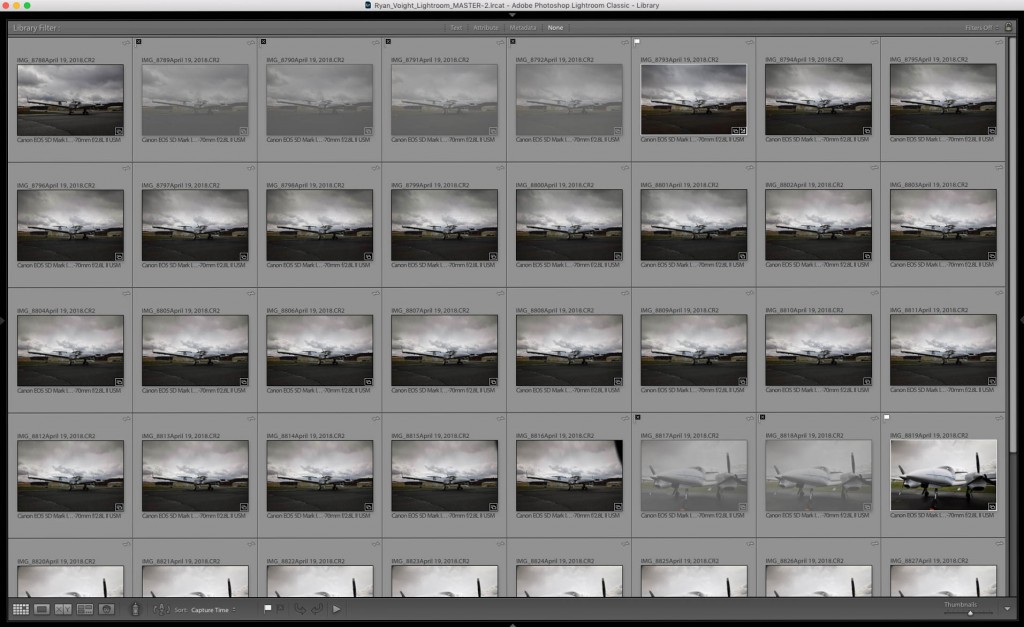
Instead of shooting one image, we need to shoot several (can’t stack only one image, can we?!). How many do we need though? MATH TO THE RESCUE! It’s ok, get back up from under your desk- no need to be scared, it’s easy math 🙂
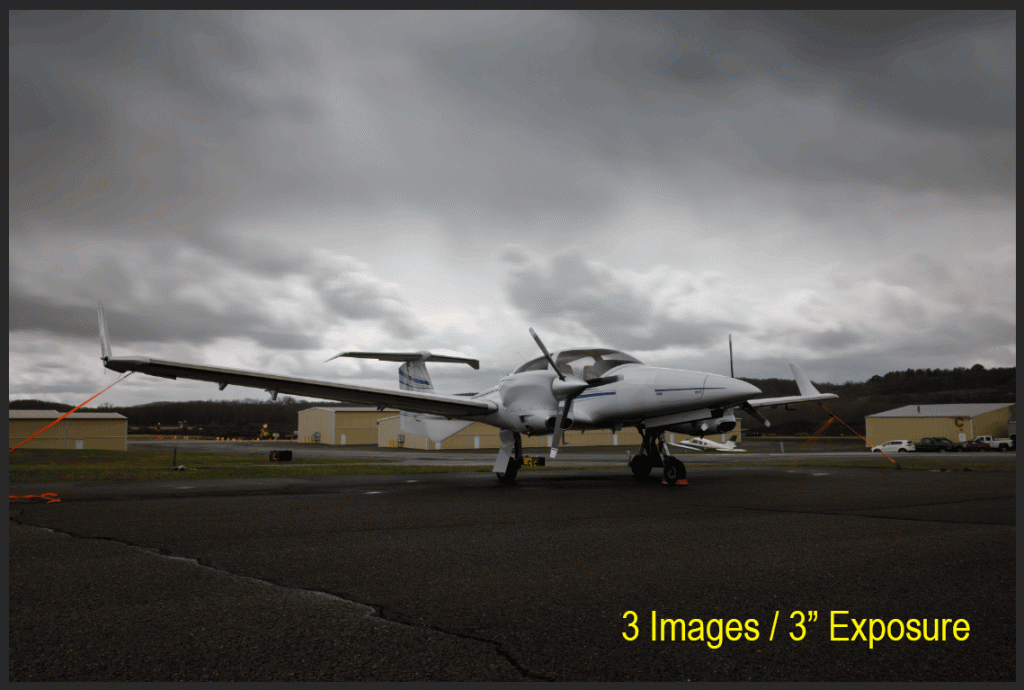
The length of your final image, after stacking, is simple multiplication. It’s the shutter speed you shoot x the number of images. Here I have 24 images, each with a 1″ (one-second) shutter. 1″ x 24 = 24″ Easy breezy. Yea, maybe I shot this at 1″ intentionally for an easier tutorial… but it’s the same principle with any shutter speed; If you shoot at 1/250th of a second, and shoot 10 images, when you put them together you’ve captured a total of 10/250th of a second… which is- going back to middle school math and reducing fractions- 1/25. So if you know how long you want your final exposure to be, knowing precisely how many images to capture is straightfoward. OR… if you’re not sure… shoot what is professionally known as “a crapload”.
- Part II: Developing
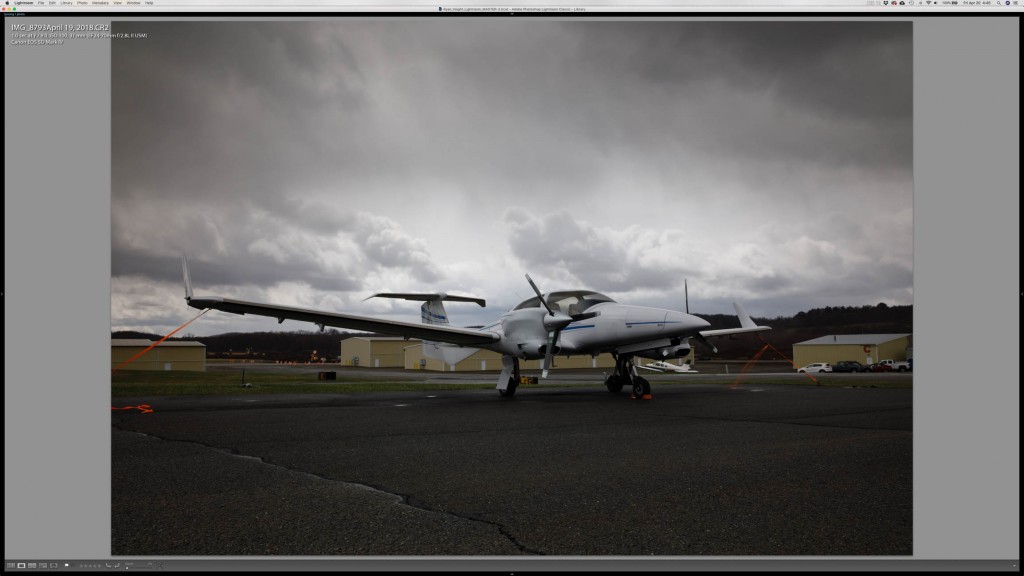
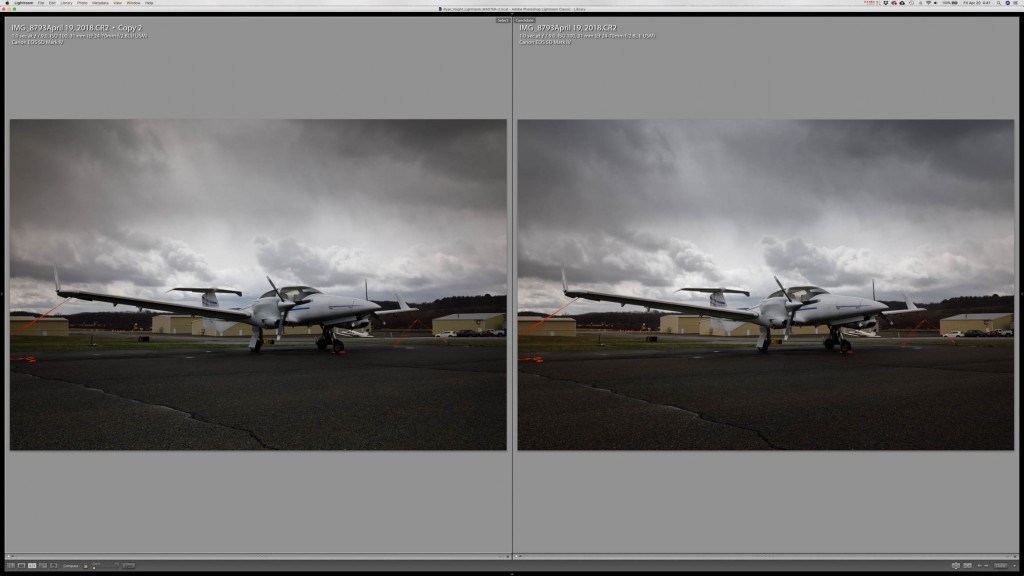
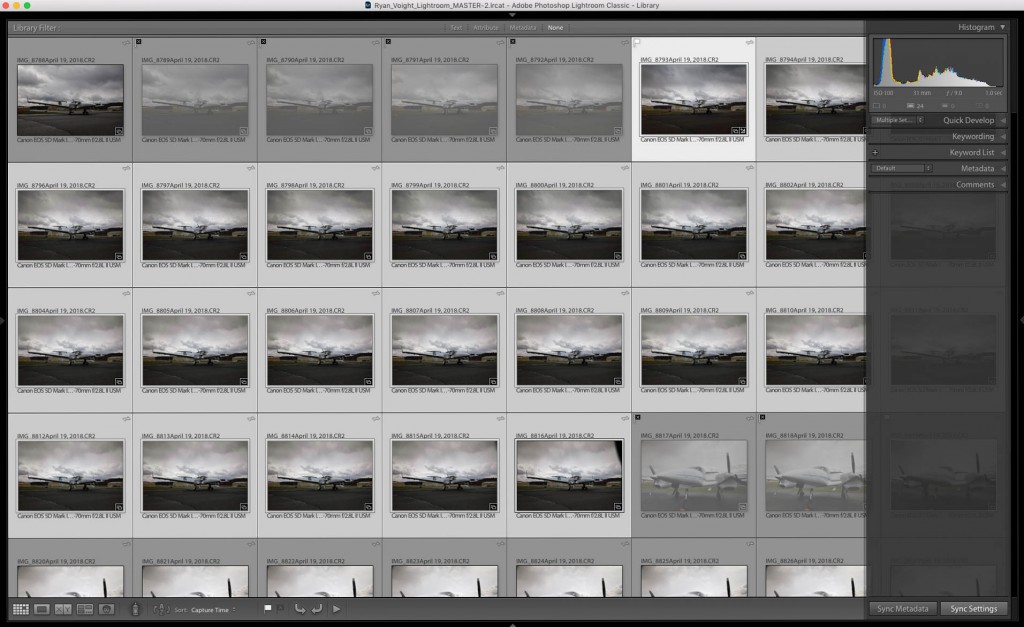
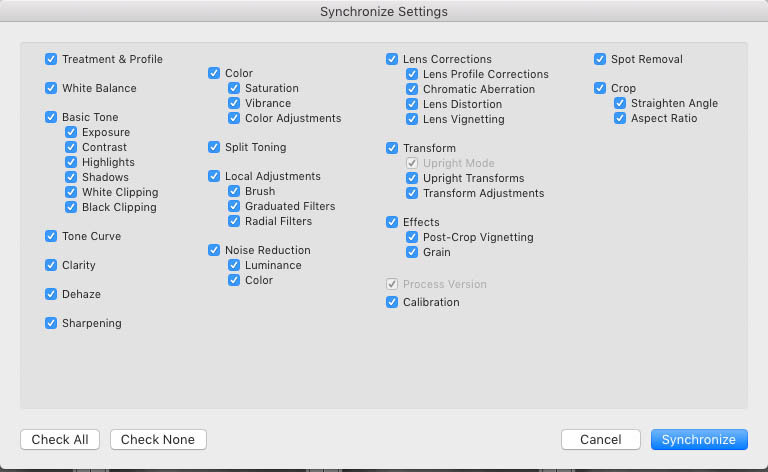
If you develop your images in Adobe Lightroom, now is the best time to do it. If you develop in Photoshop, it’s easier to do it after we stack the images. In Lightroom, open the first image in your series in the Develop Module, and go to town on it. Once you have it how you like it, go back to the Library view (keyboard shortcut ‘g’ for “grid”). The first image in your series- the one you just developed- is probably still selected, but if not click on it once to select it. Scroll down to the last image in your series, HOLD THE SHIFT KEY, and click on the last series image. Holding shift tells Lightroom to select everything between what was already selected- your first/developed image- and the last one. In the pane on the right, at the bottom, click “Sync Settings”. A window will pop up with a bunch of check boxes, allowing you to select which settings to sync- since we are taking all of these individual images and turning them into one single image, it’s critical they all have the same adjustments applied. Click “Check All” and then select “Synchronize”. It might take a second, but you’ll see the thumbnails of all the other images update with the adjustments you applied to the first image. Neato!
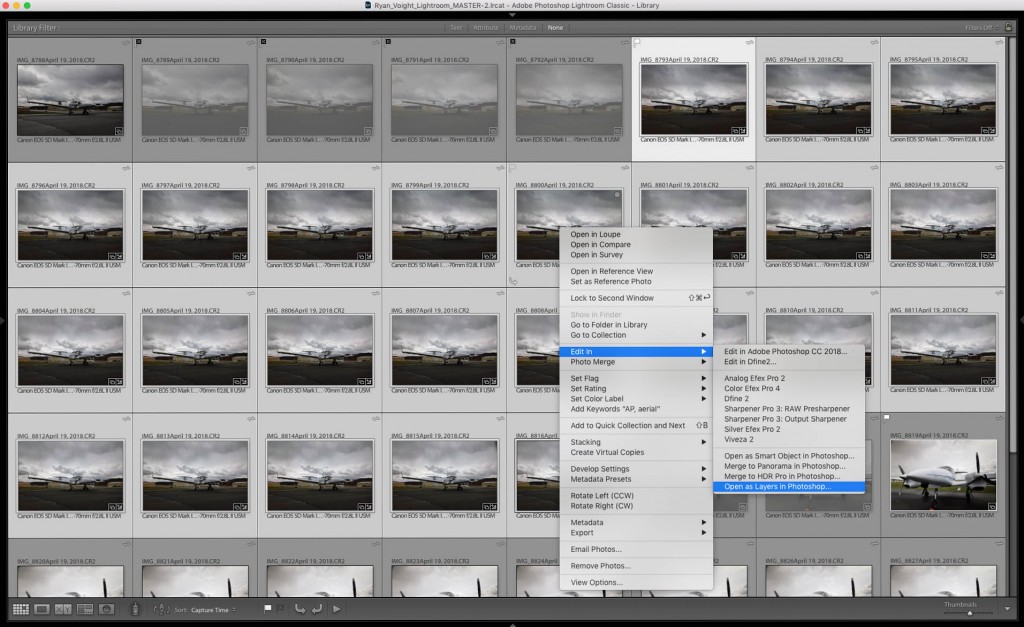
Now let’s take our developed images over to Photoshop and let that software do it’s thang. With all of your series still selected (or go back and select all the images in the series again), right click and find where it says “Edit In…” The very first option is probably “Adobe Photoshop”. DON’T CLICK ADOBE PHOTOSHOP! Instead, at the very bottom of that list, select “Open as Layers in Photoshop…” You don’t even need to have Photoshop open already- Adobe’s got you covered, and as soon as you click PS will launch automatically. It might take a minute for each of your images to load (as individual layers) into PS- larger files/images and more adjustments can take longer, and obviously more images takes more time to load.
- Part III: Stacking
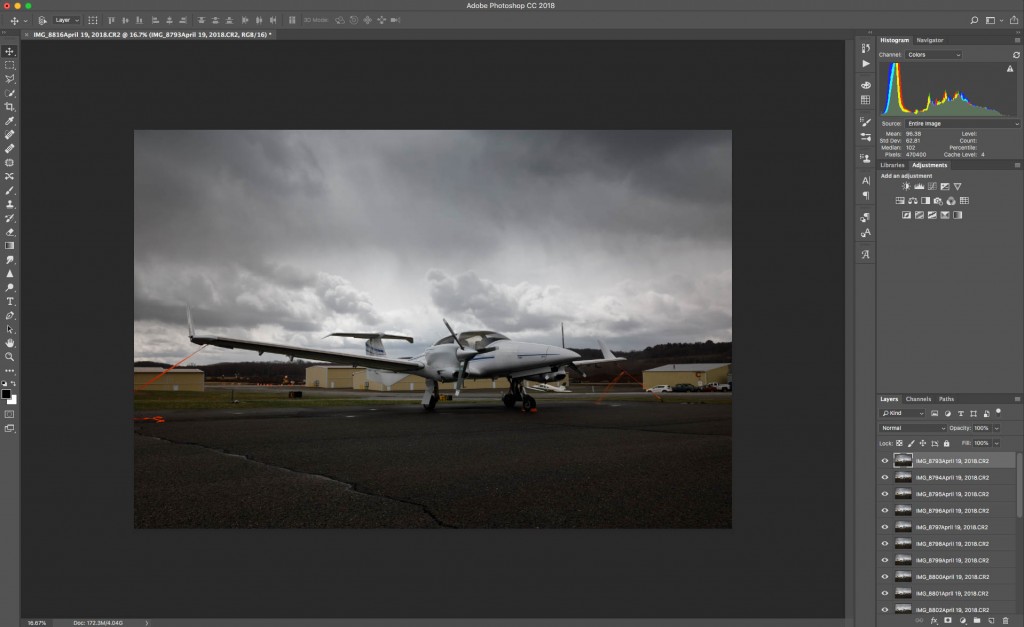
After loading into Photoshop we see just the first image still, but in the lower right we can see all the layers are hiding under there You should now be looking at the first image from your series, as you developed it in Lightroom, but open in PS. In the layers panel on the bottom right you should see all the images as individual layers- although you’re only seeing the first image, the highest layer. In the layer panel, click on the first layer to select it, then scroll down to the last layer- HOLD SHIFT and click the last layer to have them all selected now.
Side tip: If you did not use a tripod/remote, with all your layers selected you might want to go to the Edit drop down menu and select “Auto-Align Layers…” I usually just leave the auto setting selected and usually PS does a really nice job aligning them all… but it’s not a solve-all and it’s no substitute to careful best-practices when shooting your images!
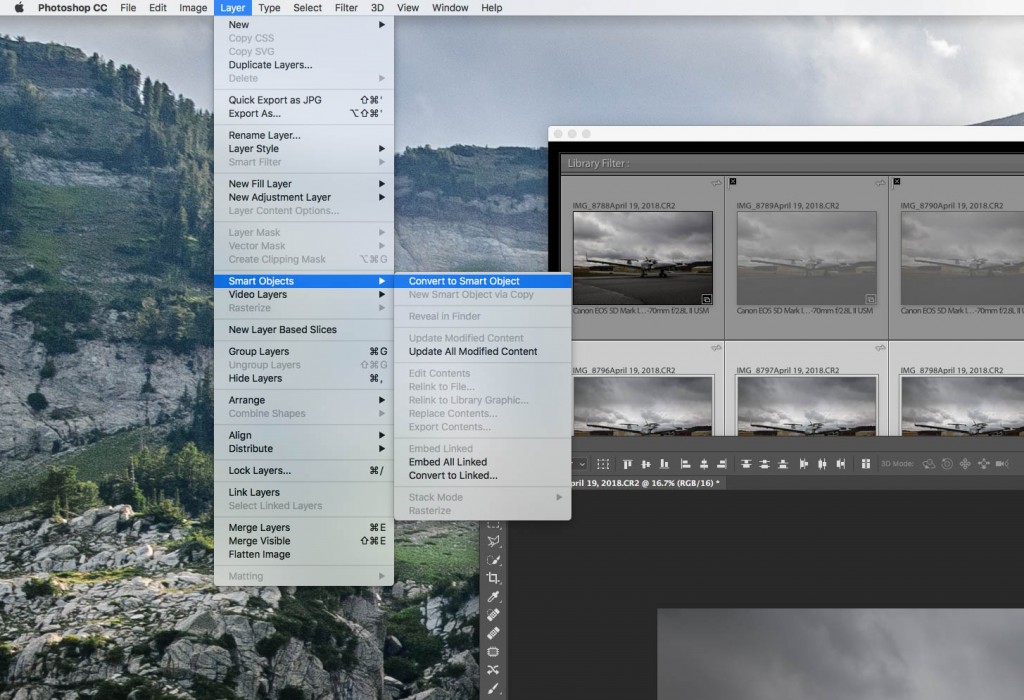
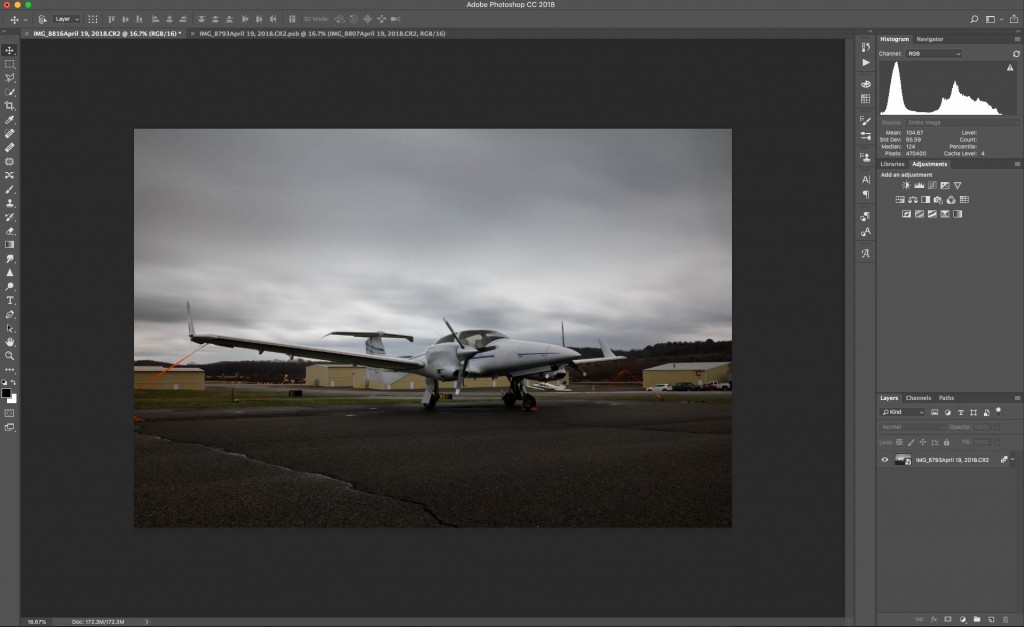
With all of your layers selected, open the Layer drop down menu and find “Smart Objects >” Select “Convert to Smart Object”. Again this might take a minute to process… but when it’s done you’ll see… well, you’ll see the exact same image sitting there, not looking like it has any more motion blur than it did before. Have faith- we’re almost done!
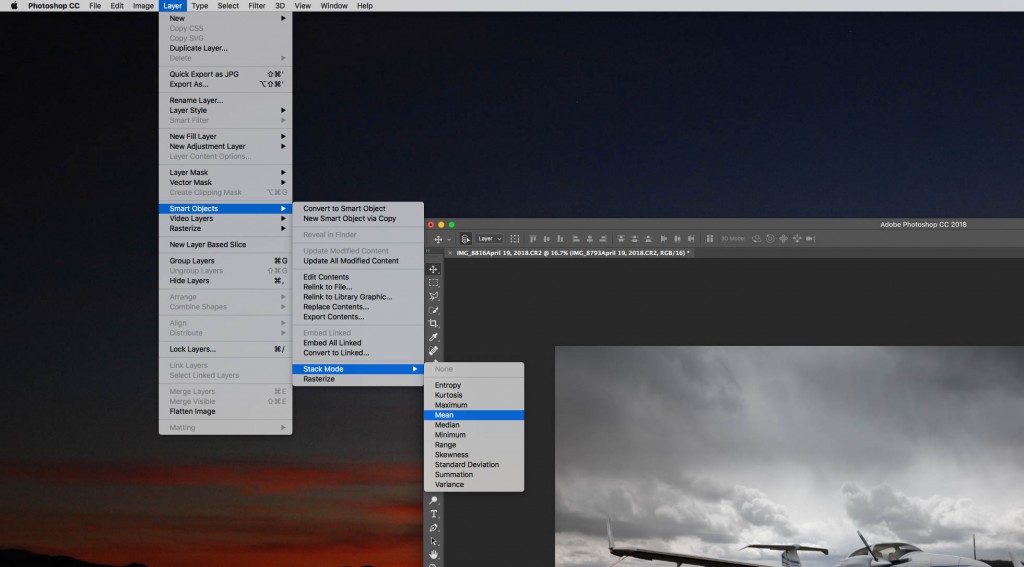
Open the Layers drop down menu again, and go to “Smart Objects >” again. Second from the bottom you’ll see “Stack Mode >” and, if you pop that little miracle worker open, you’ll find a magical new world of possibilities! For what we’re doing here, we want to AVERAGE all of our exposures into one single exposure- that’s exactly what shooting with a longer, slower shutter speed does. You won’t see “average” in those choices… don’t freak… just click “Mean” (mean is average). This will definitely take a minute or two…
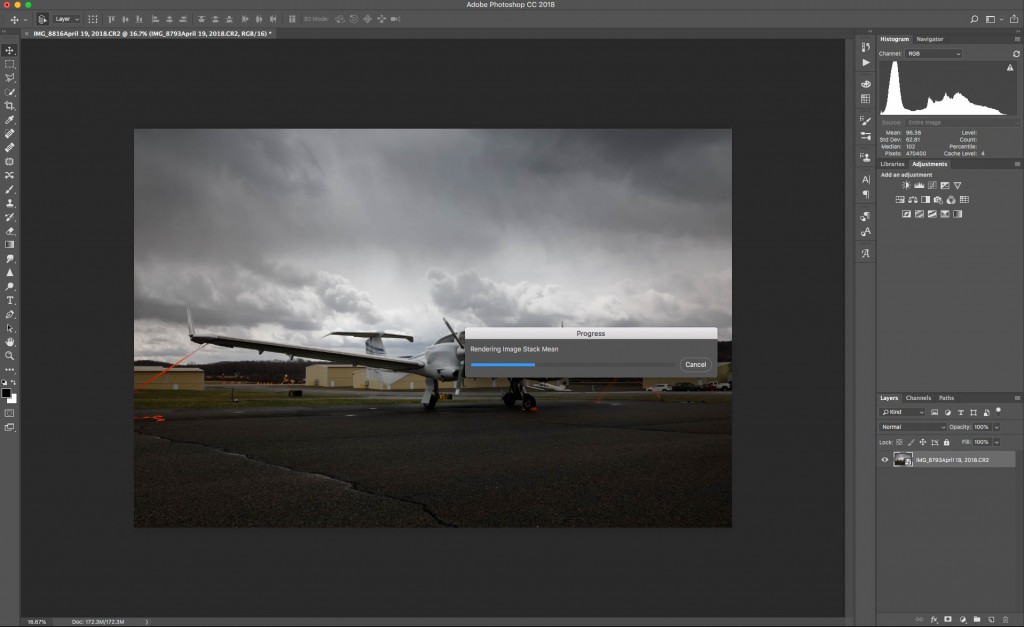
When PS is done “thinking”, you should be looking at a nice, clean slow shutter image! Voila!
- Part IV: Adjust + Edit
Want to hear something cool about your stacked long-exposure image? When we turned it into a Smart Object, PS was able to keep all your individual images intact (as layers)… and that means we can actually go back and change our exposure duration! Well, sort of… can’t make it any longer, not without adding more images (layers). But what we CAN do is open the smart object by double-clicking the thumbnail in the layers pane, and we can click on the little eyeball next to one or more layers- hiding it and thus removing it from the averaged stack… and reducing the combined image by whatever shutter speed you used.
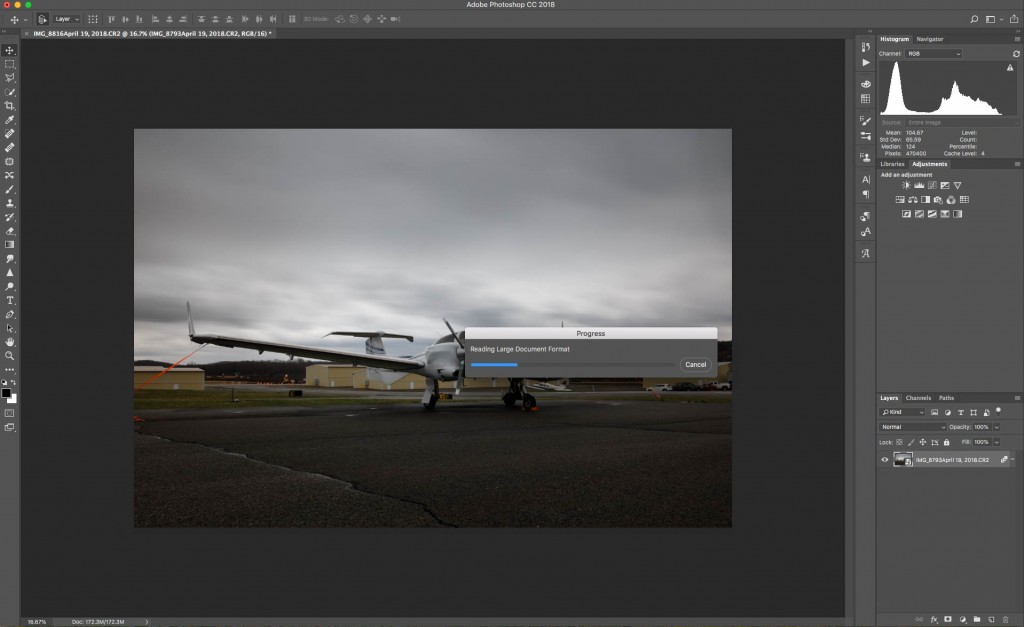
In my case here, each layer reduces the combined image by one second. How cool is that, right?! So, from the comfort of my couch, I can select the exposure duration I want- anything between 1″ and 24″, in 1″ increments (because I’m super-duper smart and shot each image at 1″… or because I’m dumb and I’ve done this too many times using much more annoying shutter speeds to play with like this!).
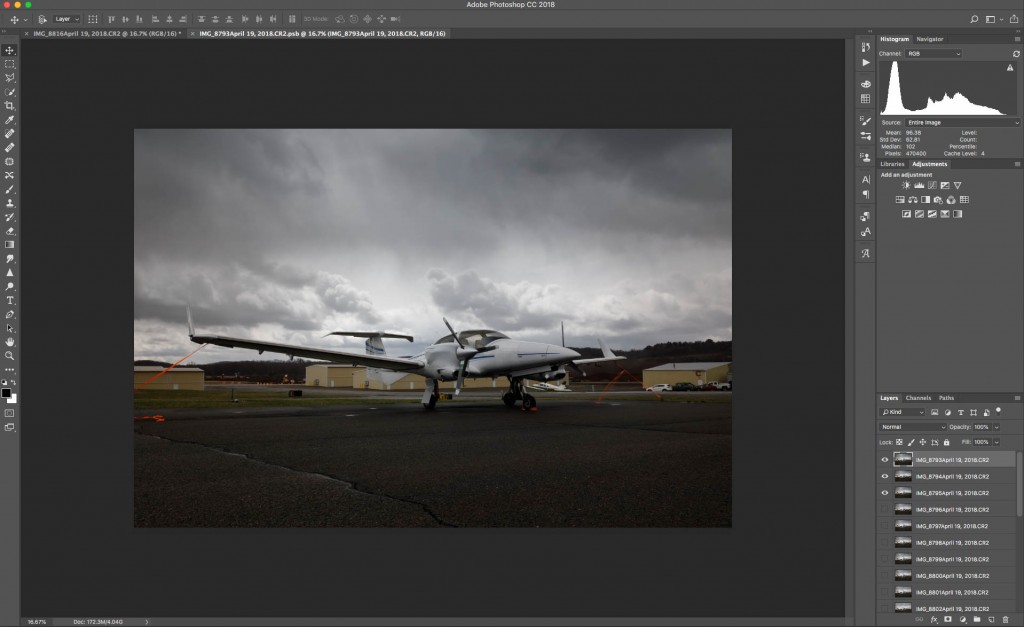
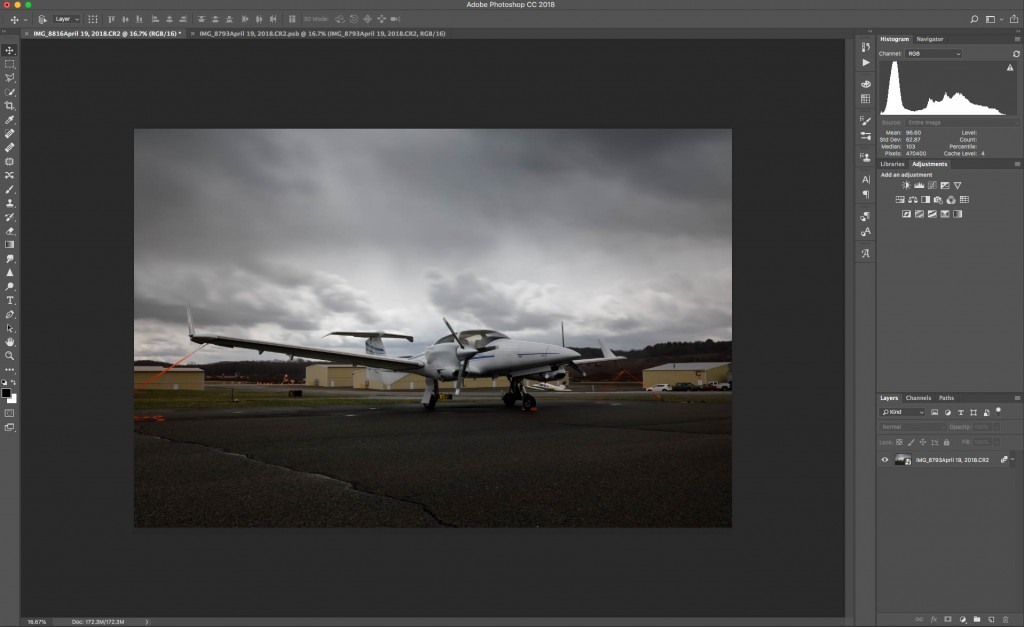
When you decide on how many images/layers you want, you can do whatever adjustments, effects, filters, etc while you’re still in PS… before saving and switching back over to Lightroom.
When you’re done in Photoshop- at least for now- press CTRL+S or go to the File drop down menu and select Save. Again, Adobe is super smart… and Lightroom knows that the Photoshop file you were just working on originated in Lightroom… so after you save it and switch back to Lightroom you’ll see your new image was automatically added to Lightroom. You can actually edit this NEW image in Lightroom all over again if you so choose… but I’ll remind you that we already developed it once, so be careful not to go too crazy pushing and pulling the image or you’ll find the limits of what information is there and can end up with a less-than-ideal result.
Side Tip: If you feel confident in your stacking settings and any adjustments applied in Photoshop, you can greatly reduce the size of the saved image file by going to the Layer drop down menu and selecting “Flatten Image”. WARNING: Once you do this you no longer have a stacked image, and no longer do you have a Smart Object- so you give up the ability to open it back up and make changes to what you’ve done in PS. My opinion is that hard drives are cheap (relatively), and I’m constantly learning and improving as a photographer and photo editor… so I like having the ability to revisit if I feel I can do a better-enough revision to justify the time investment. But I’m also working professionally, and having a *significantly* smaller file is probably the best choice for more casual shooters…
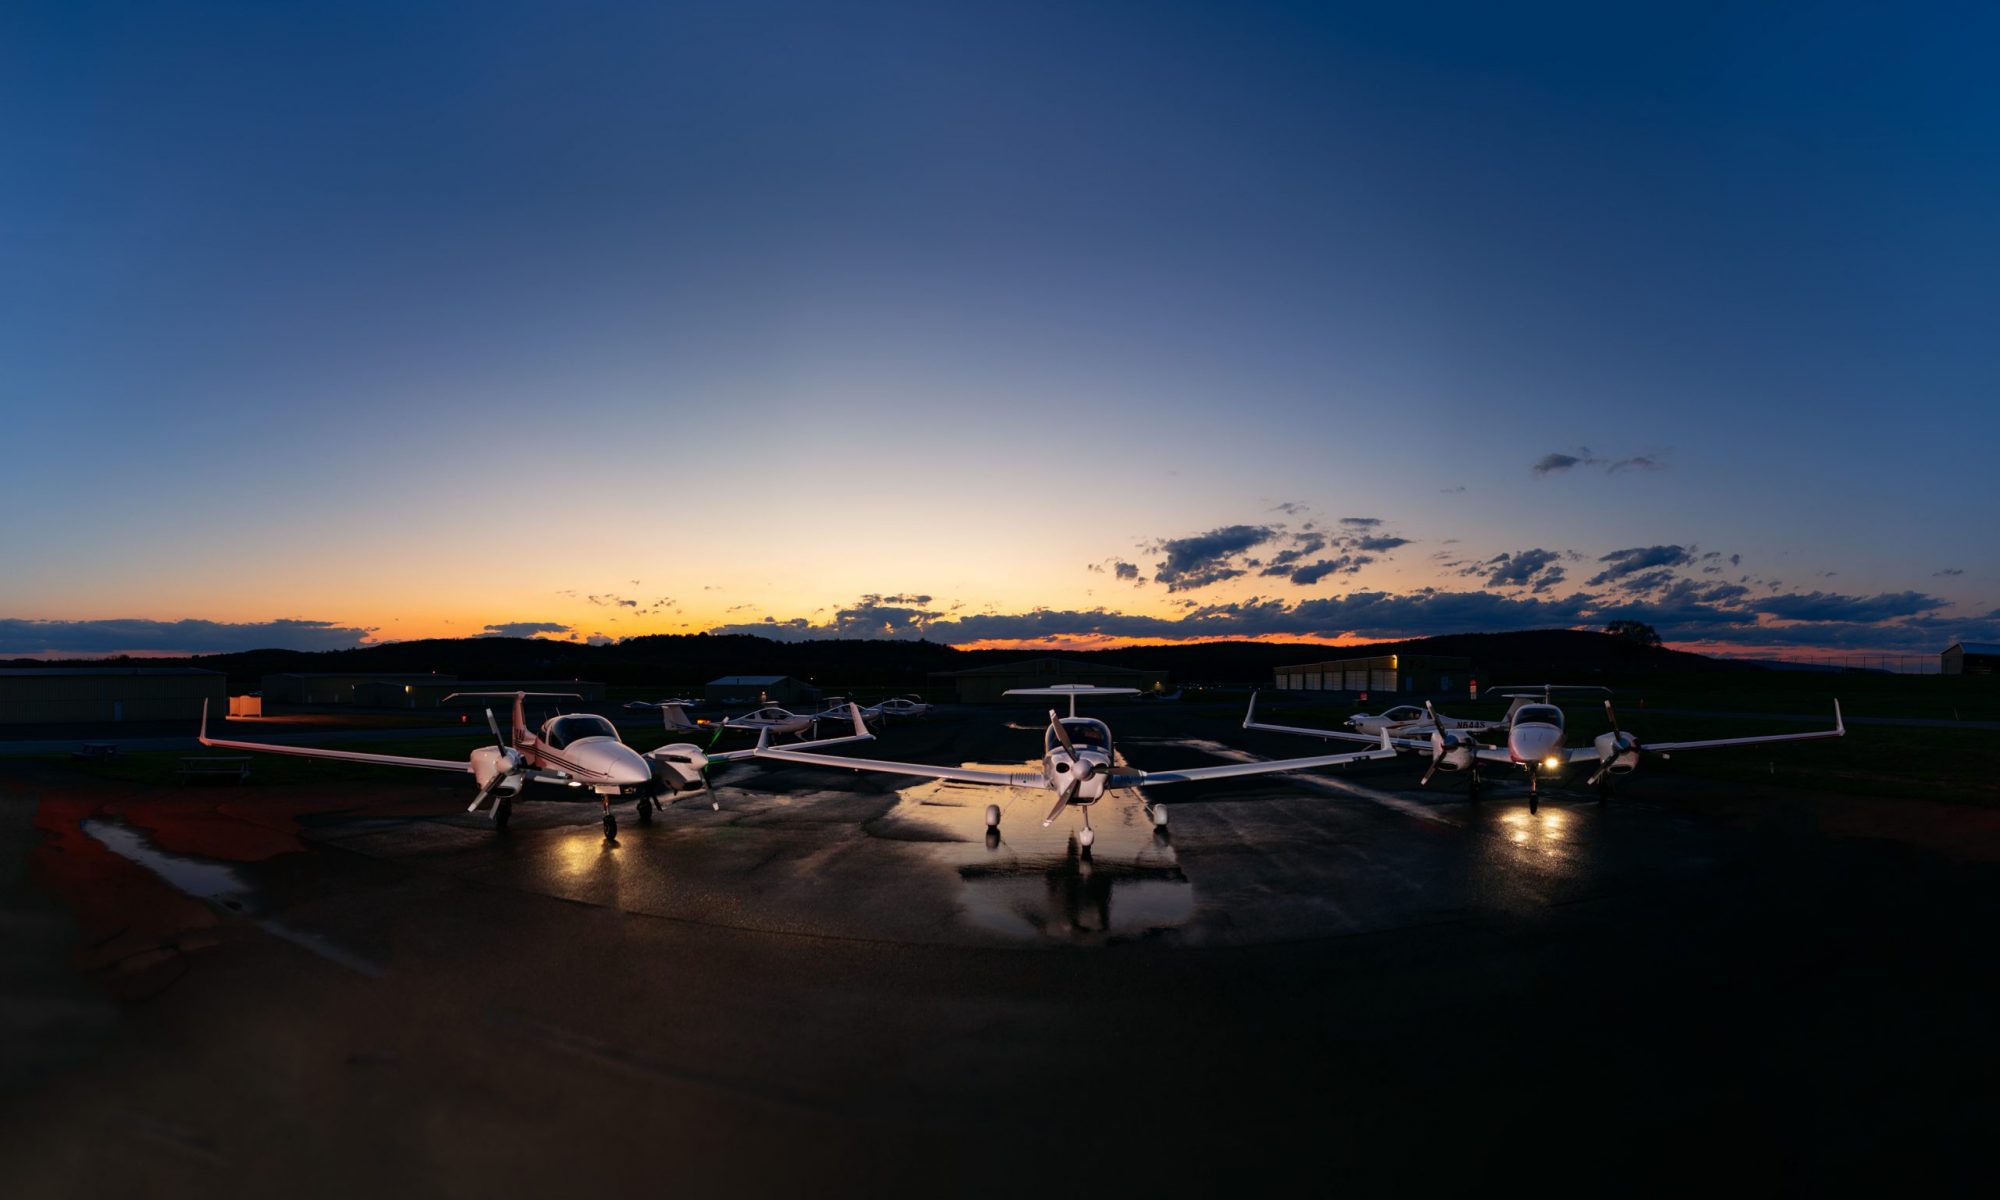
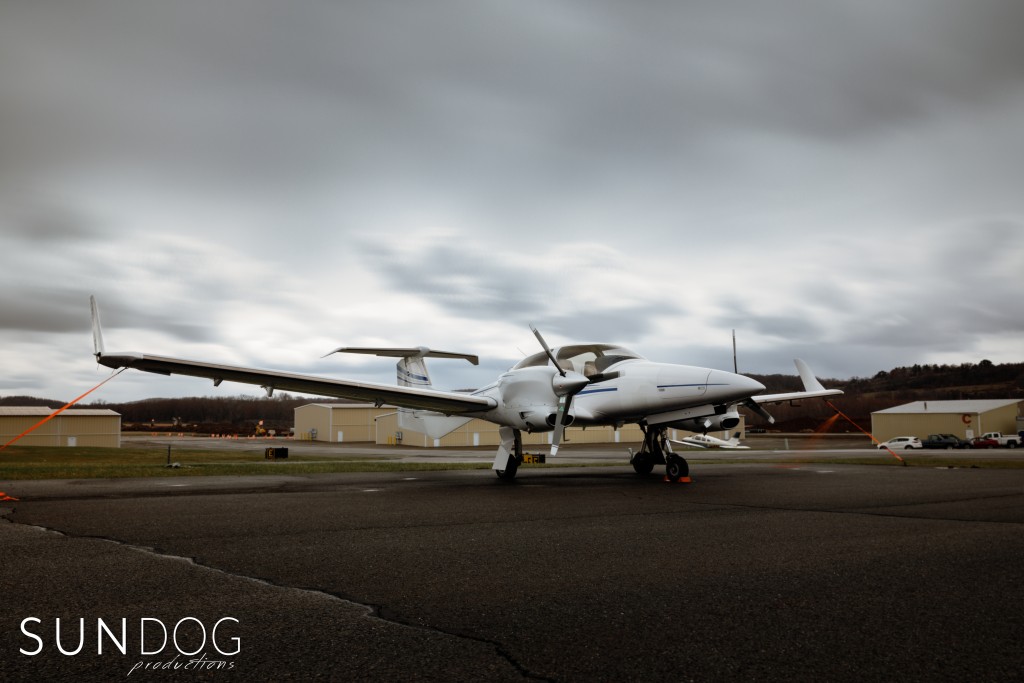
My final image, created by following this tutorial exactly:
- HOW TO DO THIS MANUALLY (IE How to do this in other editing software)
I need to keep this very general so it can be applied to the *many* photo editing options out there. Note that to do this whatever your software is needs to support layers and changing the opacity of each layer (if it supports layers, chances are very good you can adjust each layers opacity).
Sorry, but there’s more MATH coming. Ok, ok… it’s still pretty easy math…
We need to start from the very last layer- the bottom or lowest one. Leave the opacity of that one alone (100%). For the second layer from the bottom, set the opacity to 1/2… aka 50%. For the third layer from the bottom, set the opacity to 1/3… aka 33%. Fourth layer = 1/4 = 25%, fifth layer = 1/5 = 20%… and so on, and so on, and so on. Fun! not really… but it’s simple and it’s the same thing in the end…
- SYNOPSIS:
If you’re in a hurry, just read + follow this 🙂
- Take a series of photos
- Develop the first one in Lightroom
- Apply those adjustments to the full series of images
- Open as Layers in Photoshop
- Convert to Smart Object
- Set Smart Object Stack Mode to Mean
#DONE
- PRO’s and CON’s to Image Stacking for Long Exposure Photography
- PRO: Do not need to buy/carry/use Neutral Density (“ND”) lens filters ¹
- PRO: Faster capturing experience than installing filters (nice when it’s cold, or raining, or dangerous location).
- PRO: Shooting through less glass, so less chance of lost sharpness, less chance of adding undesired color-cast from “neutral” filters that aren’t truly neutral (most of them!!!), and less opportunity for dust, dirt, fingerprints between your camera and your subject- every filter added has two sides to keep clean!
- PRO: Ability to reduce motion blur/exposure time and “look” in PS
- PRO: Adjust exposure duration using a much bigger/better monitor than the on-camera LCD
- PRO: Quality! Each stacked image is “cleaner” and has less noise than a single in-camera long exposure
- PRO: So simple- only takes a couple clicks!
- CON: Shooting many images fills memory card / hard drive much faster
- CON: Requires a lot of computer processing power… or patience… or both!
- CON: Software can be expensive / cheaper and free options can be buggy
- CON: Requires repeated pressing of shutter release, increasing chance of camera movement between images (best to use tripod + remote)
- CON: If the camera moved or framing changed you likely won’t know until stacking in post; Auto-align layers does’t always work, manually aligning SUUUUCKS!!!!
- CON: Additional workflow and greatly increased image processing time
- CON: (subjective) Less enjoyable experience! I would rather spend more time out shooting, installing and adjusting filters, and less time sitting at the computer!
- CON: (subjective) The feeling and emotion of immediately seeing your vision captured in-camera on the LCD just isn’t the same as seeing the resulting image displayed when the Photoshop processing bar reaches the end.
- CON: More wear-and-tear on equipment (many more shutter actuations)
- CON: Slight gap in time between each individual exposure which can sometimes be seen in final image.
- BIGGEST CON: Depending on subject, lighting, and desired aperture setting- the number of exposures needed becomes highly impractical.
ex) You want to create a 5-second long exposure of a bright scene, captured with the shallow depth of using a wide aperture (low f-stop number) might require a 1/250th shutter speed… if not faster! Quick math on that: 1/250 = 250 photos to capture a full second; so 250 x 5 or 1,250 individual images to capture your desired 5″ long exposure. Forget about digital storage space, shutter actuations, or my poor finger pushing the release that many times… I think my computer would *literally* LIGHT ON FIRE if I tried to process and stack that many images!
¹ Image stacking for longer exposures can absolutely be used in addition to lens filters, too! I actually used lens filters in shooting the images stacked in this tutorial.
* Special thanks to Take Flight Aviation in Montgomery, NY *
