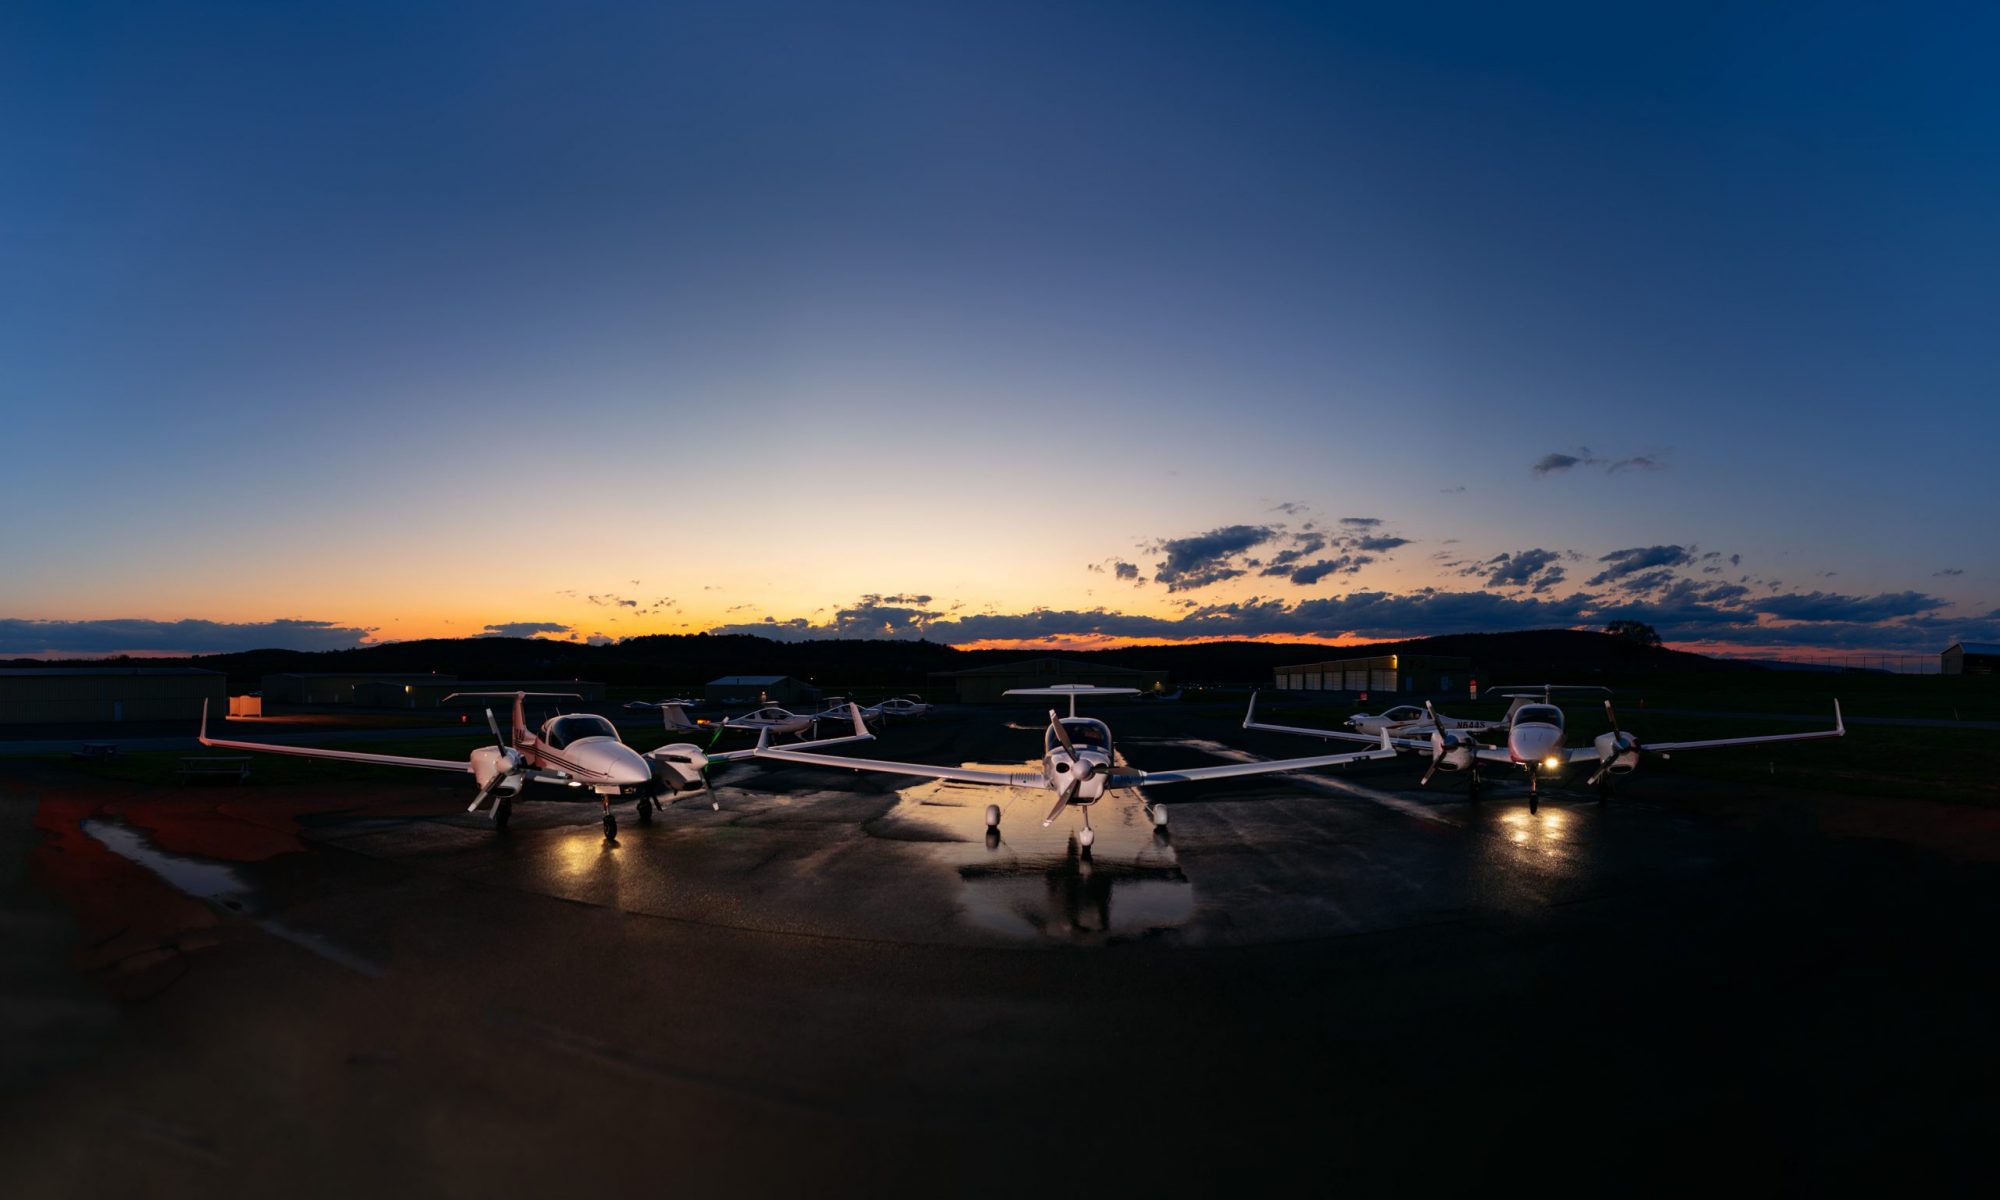

You too can capture incredible Milky Way images- and we are going to break it down into a super-simple 5-step “recipe”. You do NOT need high-end equipment. You do NOT need to be an experienced photographer! Just need a camera, and a coat… ’cause it gets chilly at night.
 Let’s run through a couple quick things before we get into the step-by-step. It is totally, absolutely, entirely true that you do not need fancy gear or even very much photography experience for really nice Milky Way photos. But- you knew there was a but coming, didn’t you– to get images like the ones shared here, the “hard part” is in the planning that goes into the shot ahead of time. Planning night/star photography is an entire subject in itself- one I will write up thoroughly in the future. For now, let’s dip into the very basic info needed to get out and get good stuff right away!
The NEED-TO-KNOWS:
- Light Pollution Sucks. The more light there is around you, the harder it is to see the stars. And even if you’re in a pretty dark or remote area, shooting toward a town or city will effect your image.
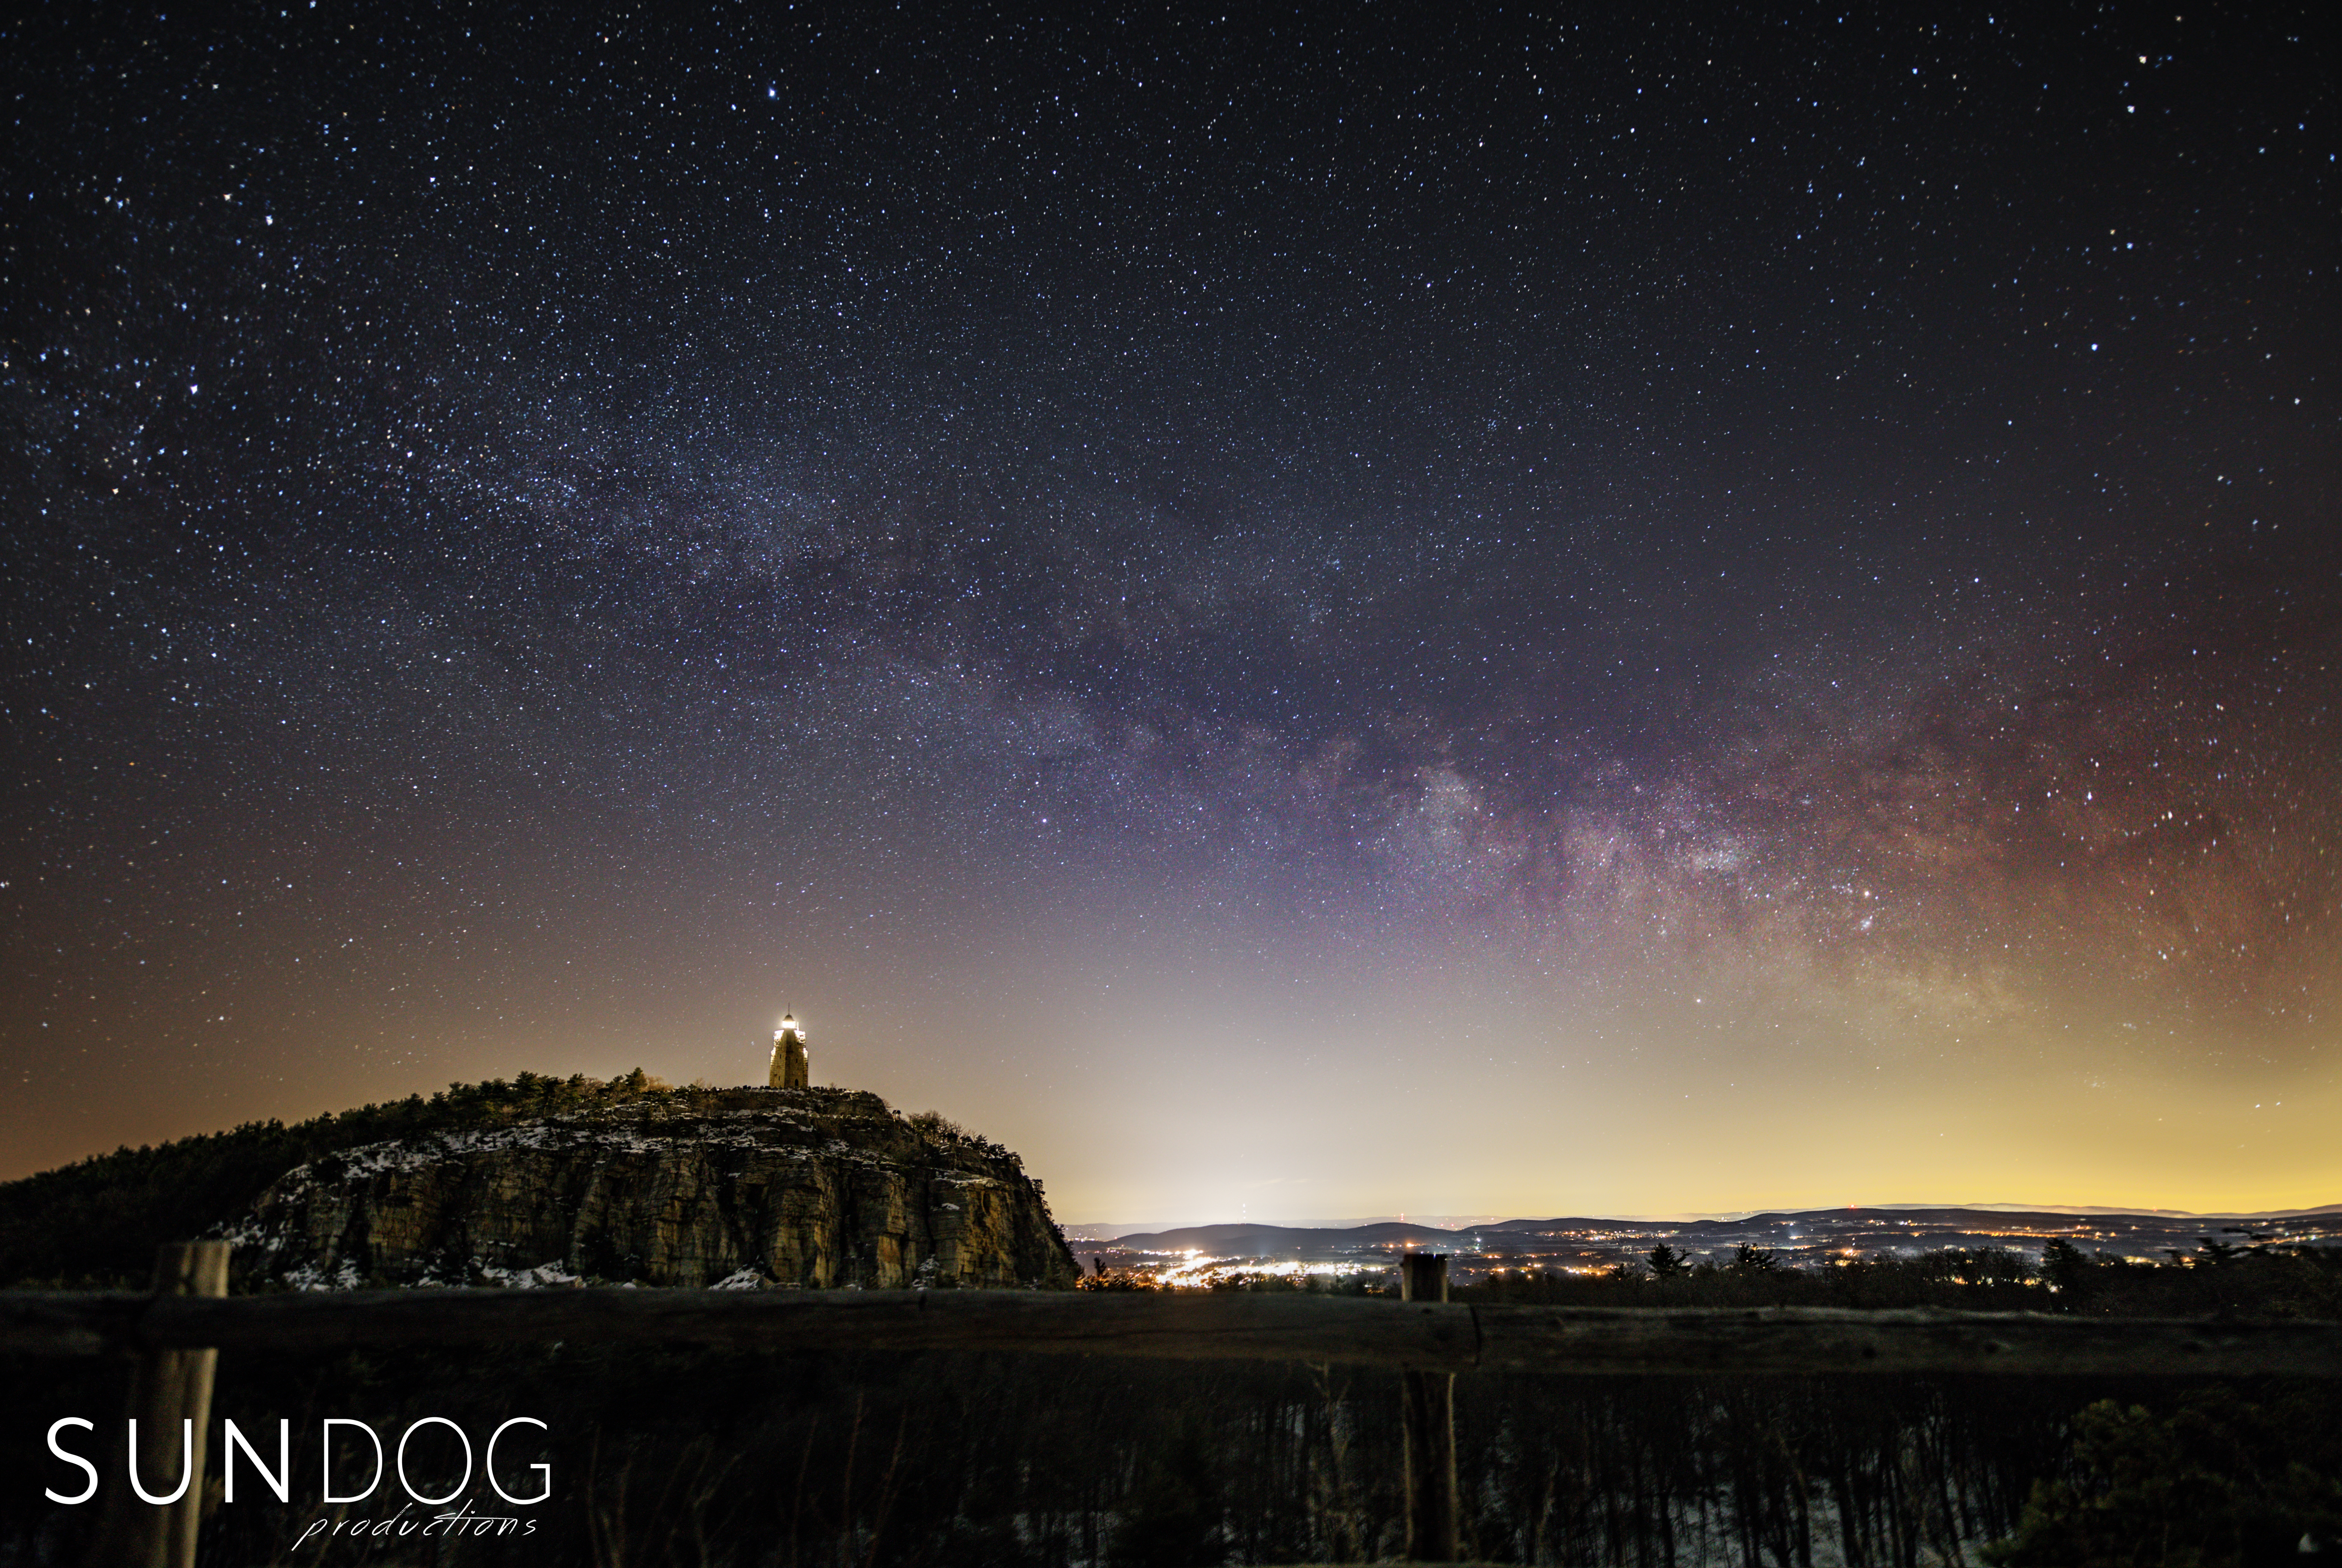
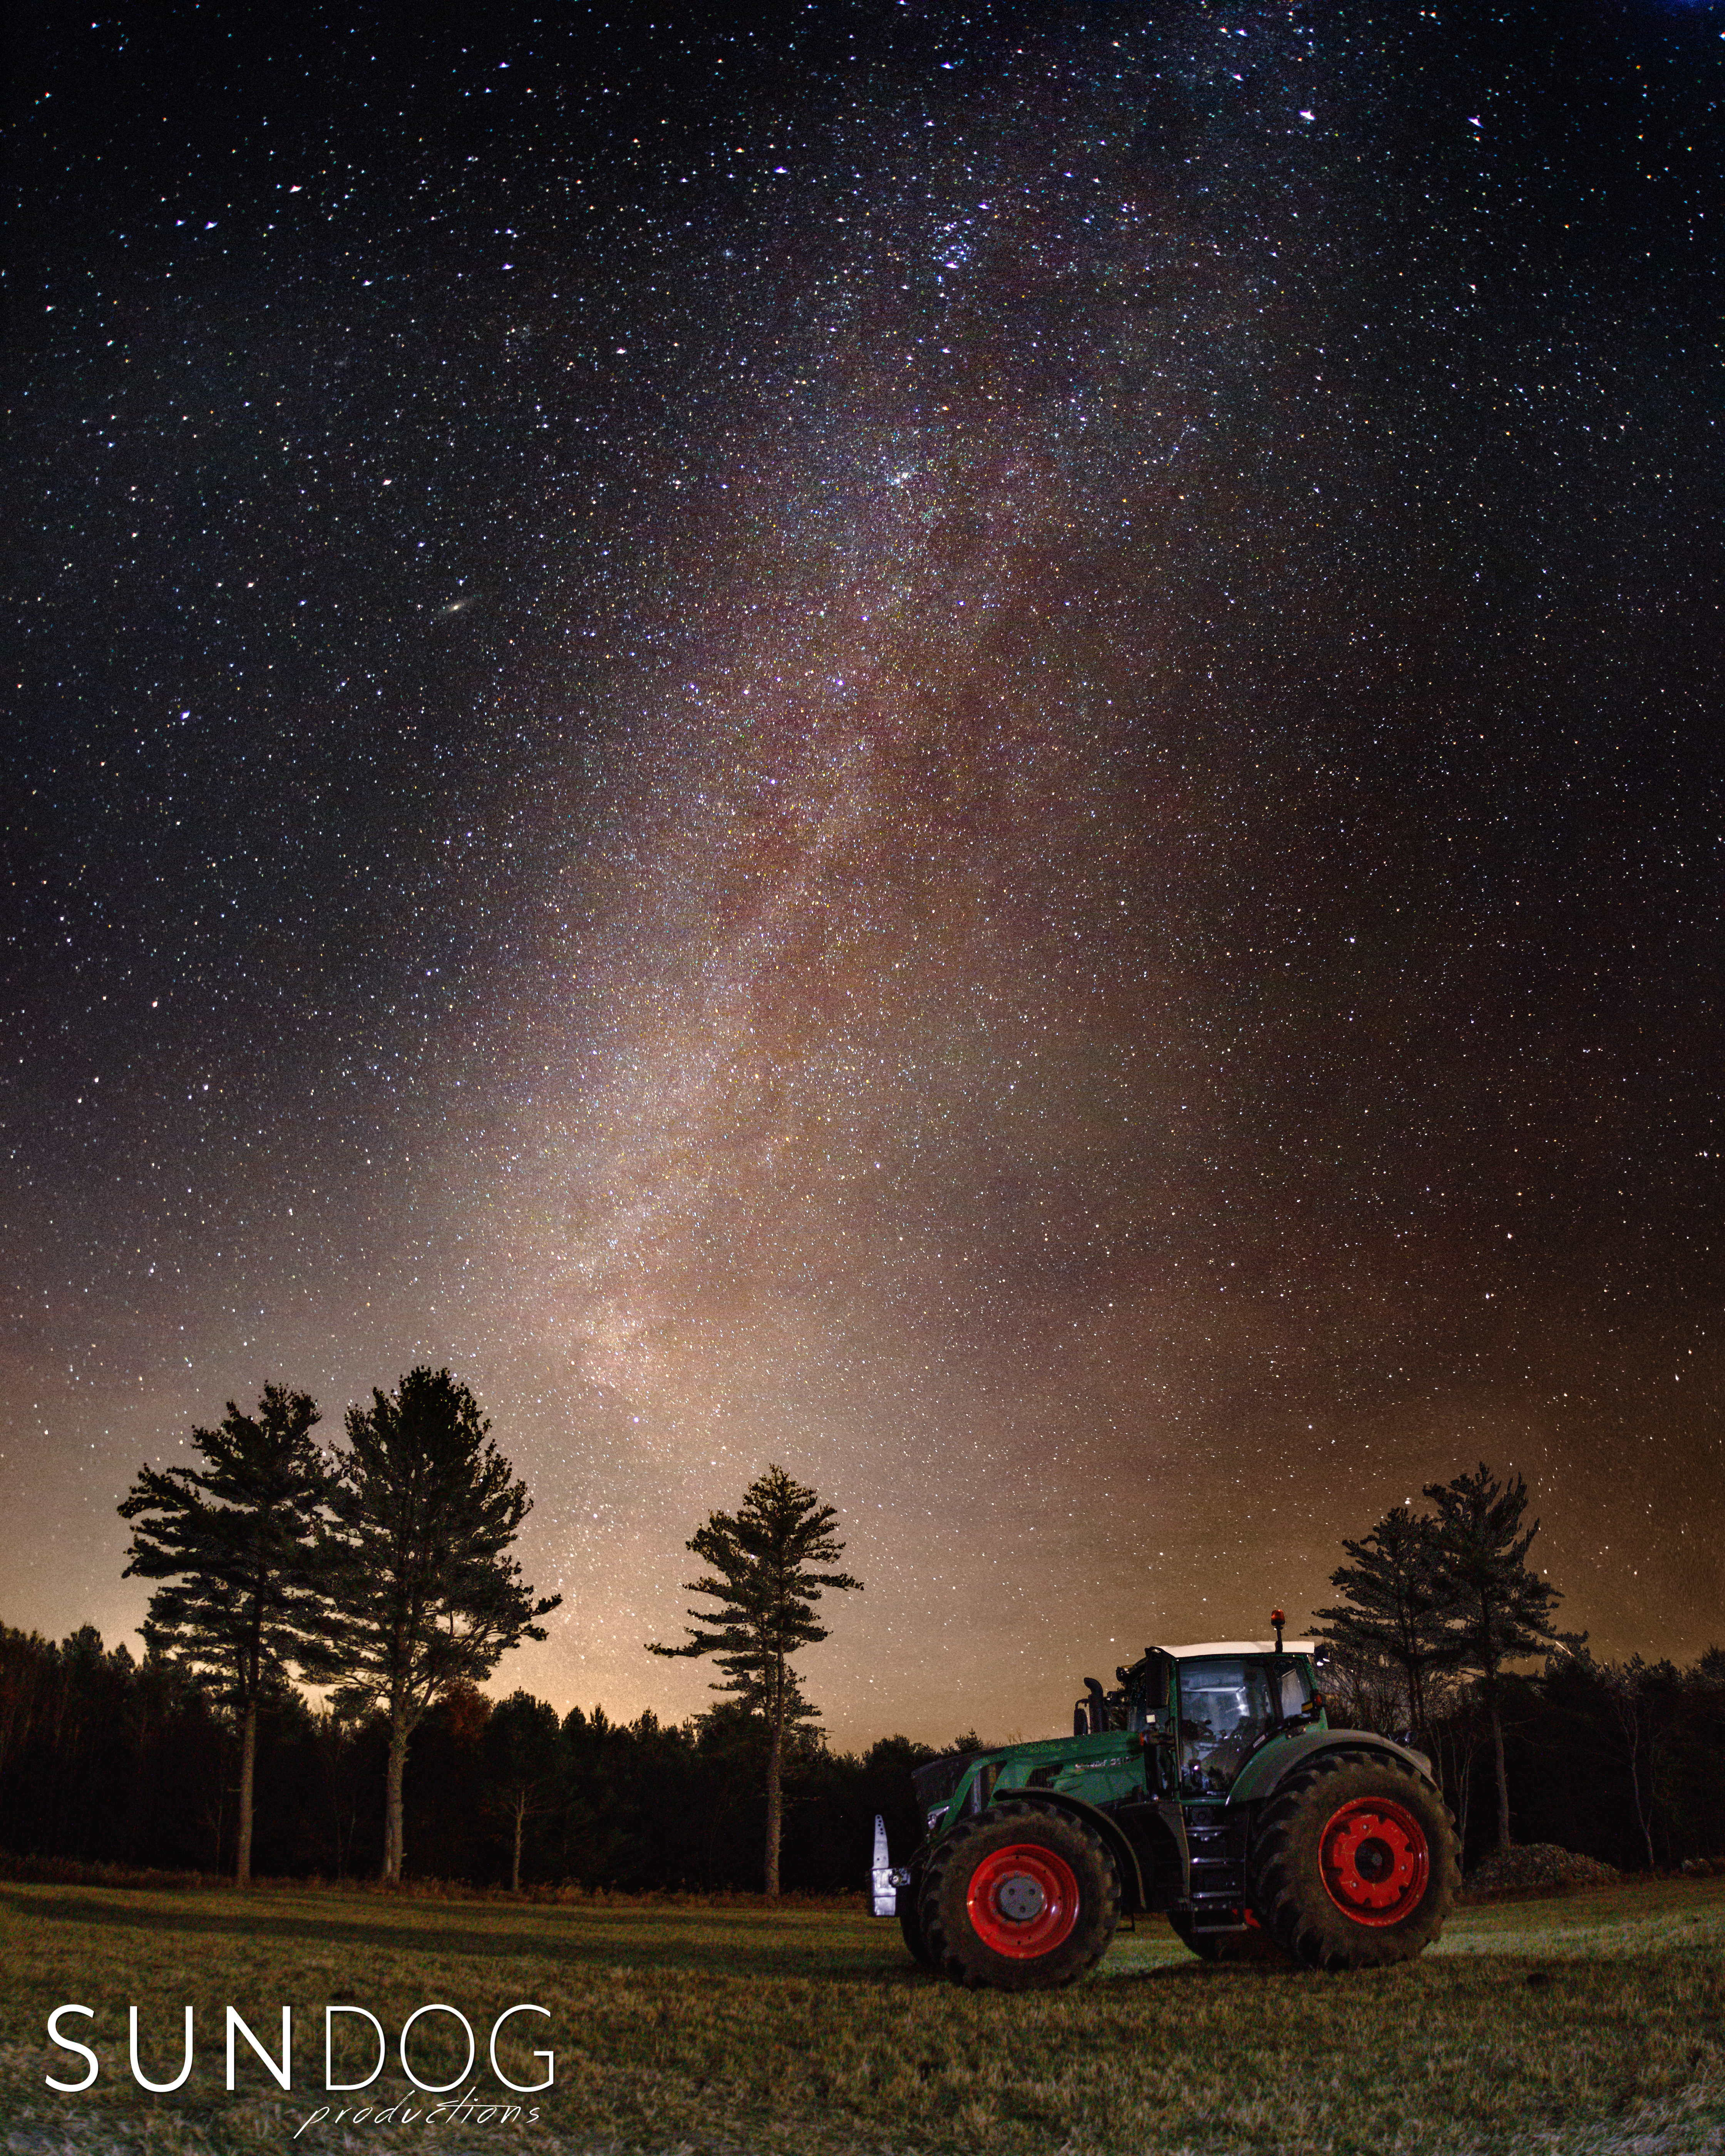
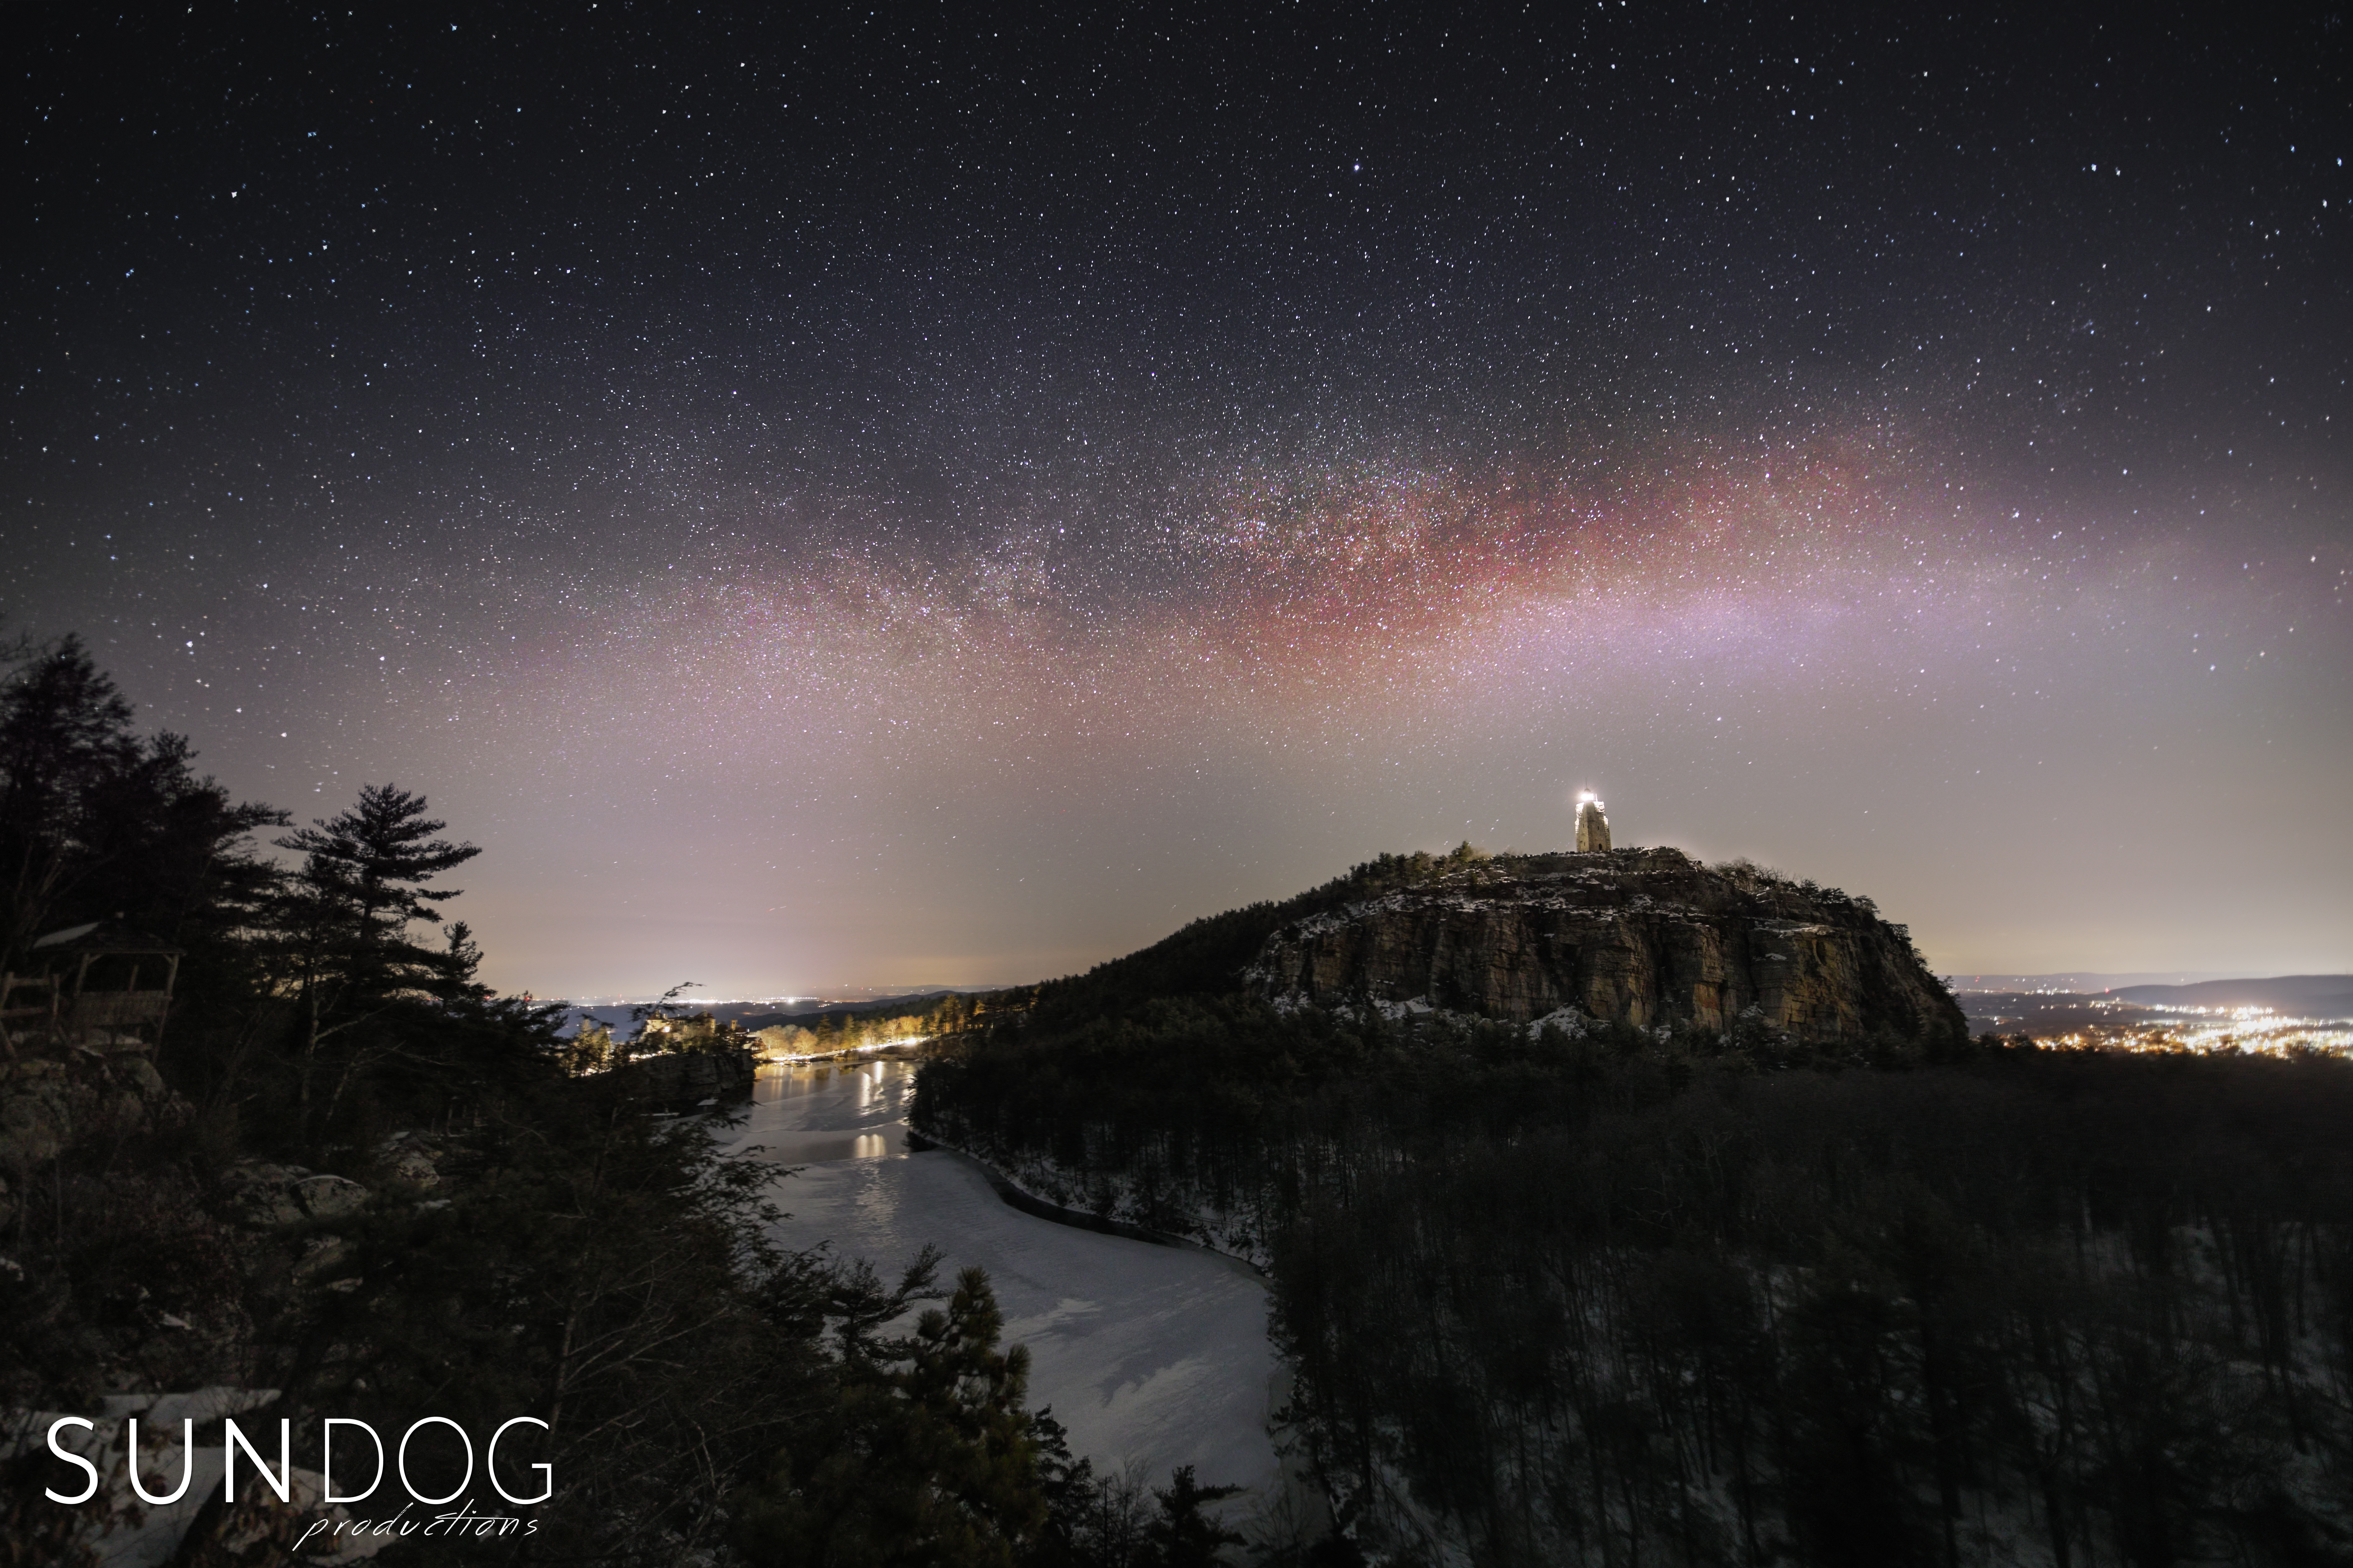
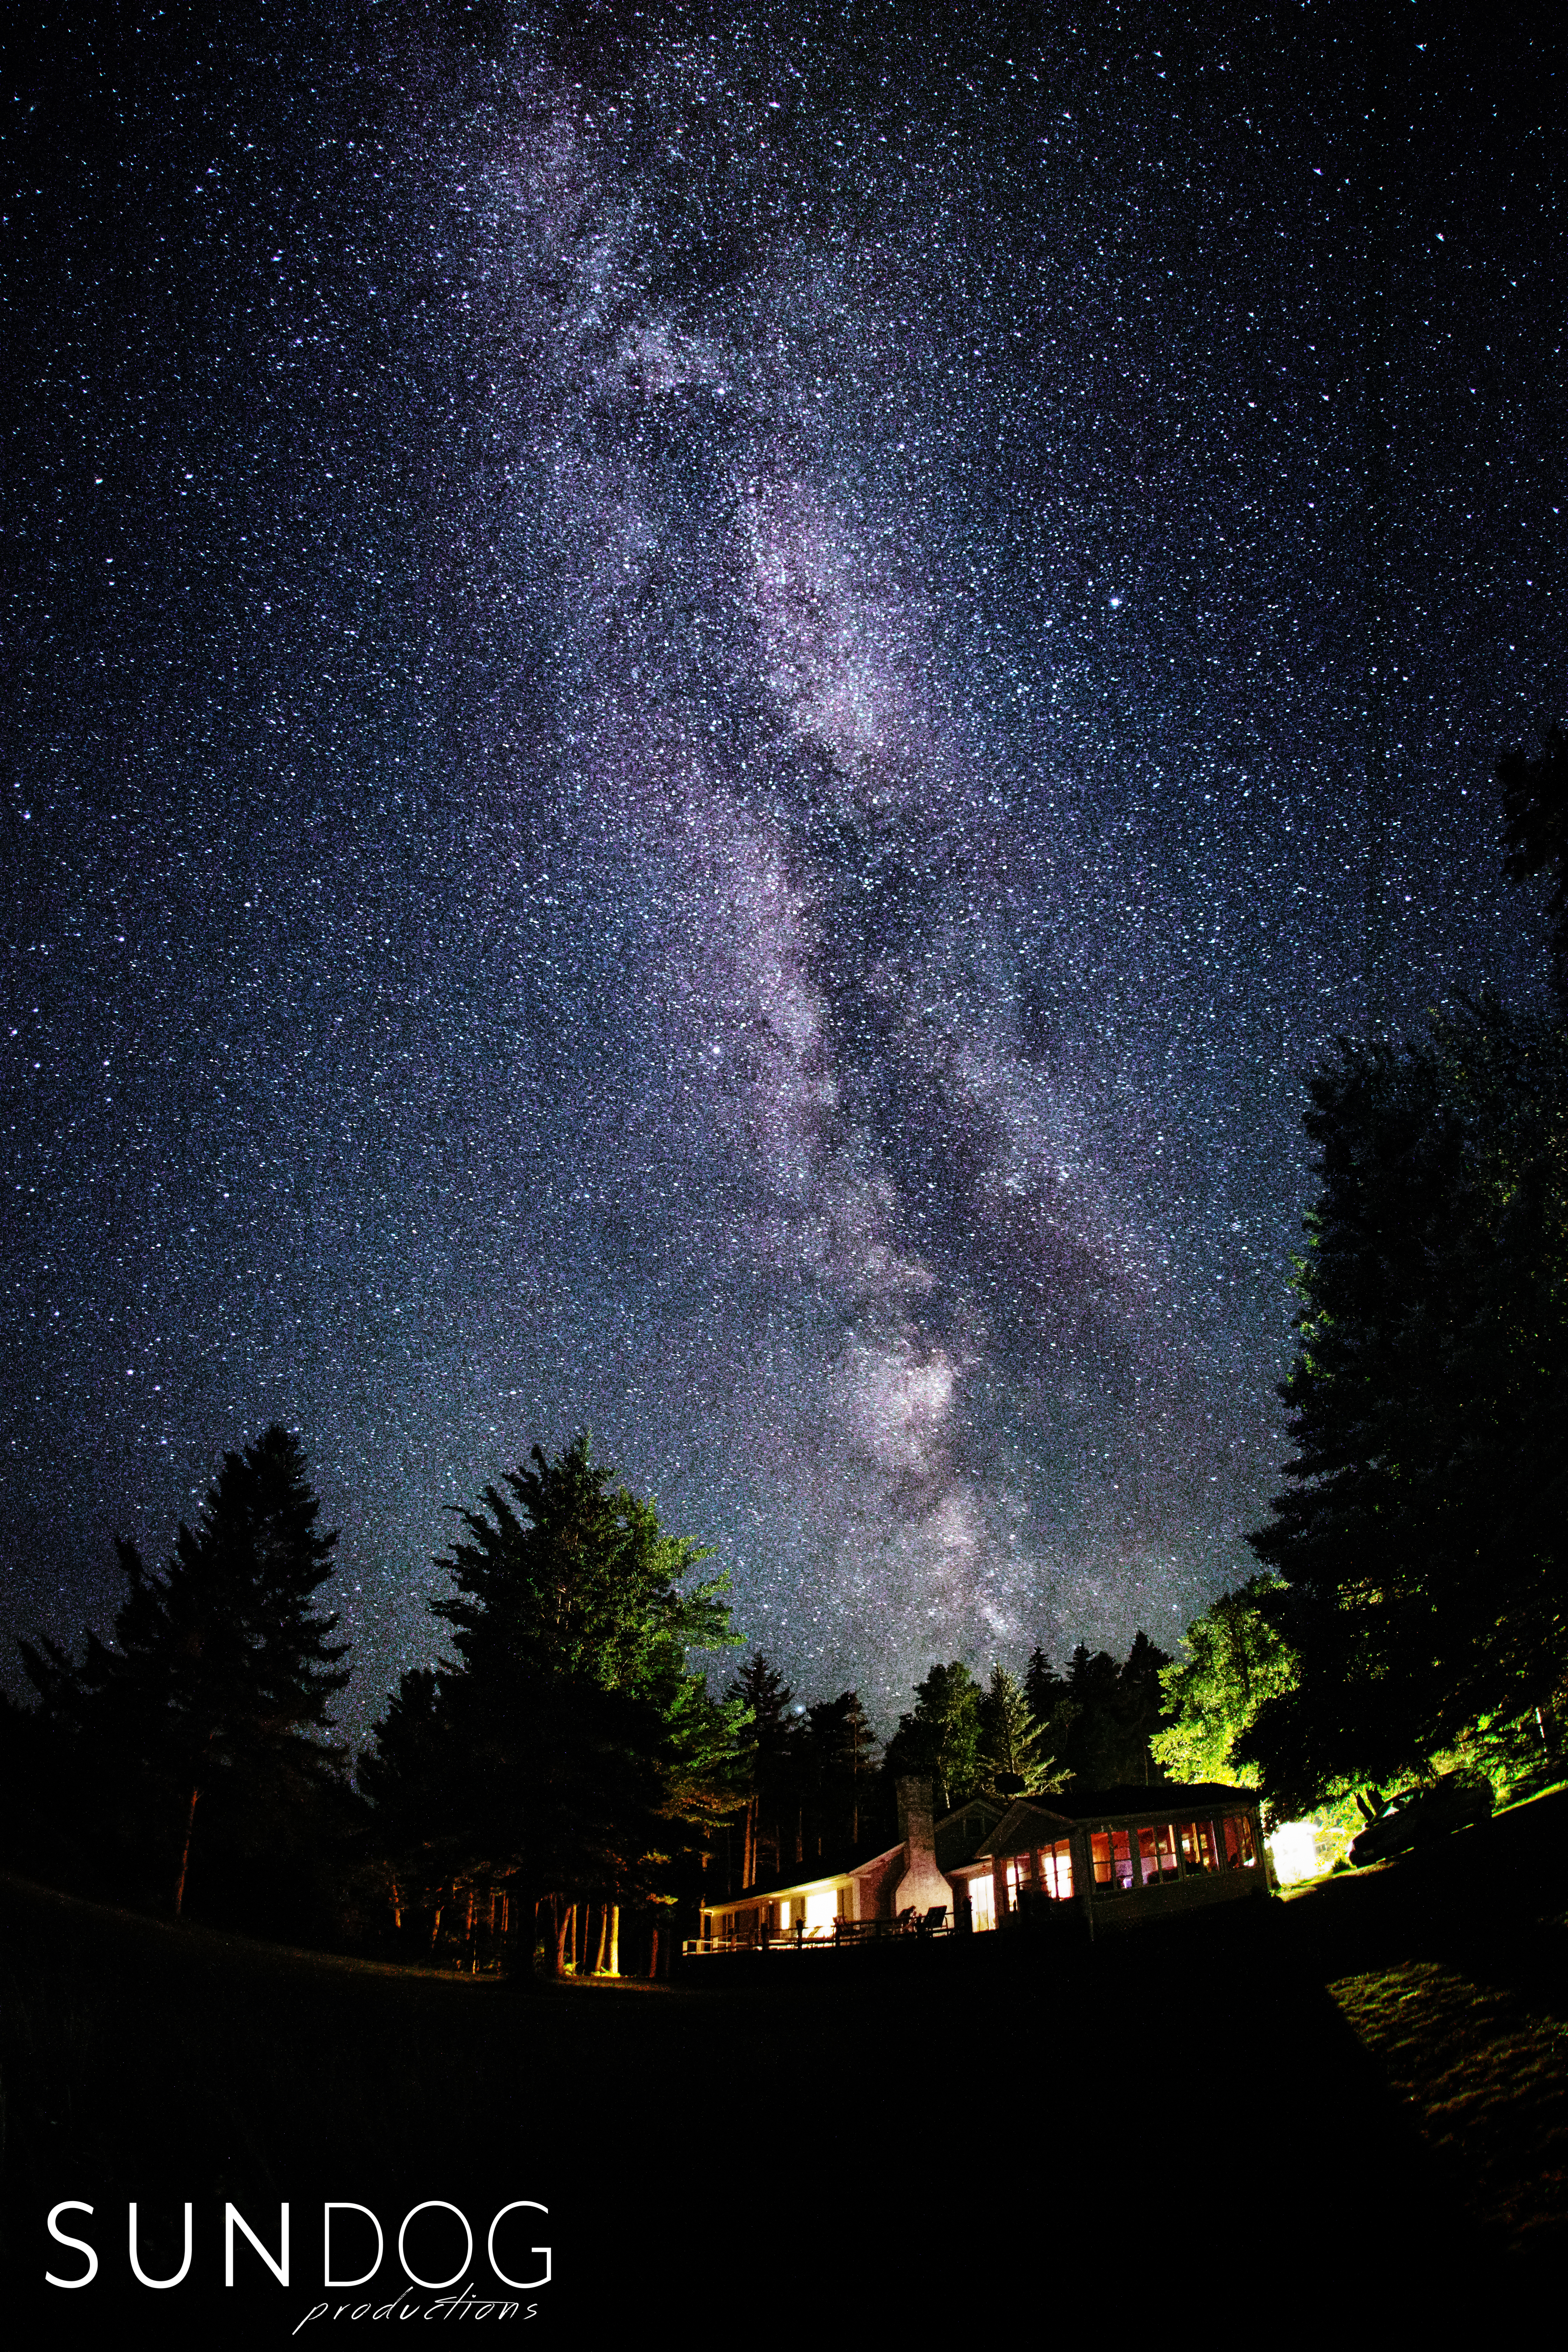
- Galaxies are BIG. No duh, right? The Milky Way spirals outward like the creme in your coffee. That’s why the “Milky Way” looks like a band with many more stars in it. Despite what your ex might think, we are NOT the center of the Universe (or even our Galaxy). What that means to us, as photographers, is that not all of the Milky Way looks the same from lil’ ‘ol Earth. Looking one way, we are looking farther out and away from the center of the swirl; Conversely, looking inward, toward the “Galactic Center” as it’s called, will give you the brightest and most interesting Milky Way images.
- When to Milk It. This crazy spinning ball we’re on just keeps on turning… so just as the sun and the moon appear to rise and set, the Milky Way appears to move through the night sky as well. Shoot when the Galactic Center is “up” (visible), and in the right direction, will give the best Milky Way images. There’s also a seasonality to it- during the winter (Northern Hemisphere) the GC is “up” during the day, when it’s too bright to see it. Summer is the season to get the best stuff! And also to not freeze to death… dying really limits the quality of our photographs. That’s a pro-tip, might want to write that down somewhere…
- Moon on Over. Full moon’s are beautiful. Just not for photographing the night sky. It’s pretty hard to see the stars when the sun is up, and after it sets the moon can be reflecting that sunlight right back at you. The BEST time for night and Milky Way photos are around the “New Moon” (when nearly the whole moon is in the Earth’s shadow). If you’re impatient like me, waiting at least until the moon sets, or shooting before it comes up depending on it’s timing in relation to sunrise/sunset is a better option than trying to shoot stars with that bright orb overhead.
The MUST HAVES:
- Camera. “full-frame” DSLR’s are best, but *any* DSLR can capture excellent results. Don’t have a DSLR? Most point-and-shoot cameras would surprise you with what they can produce… so pretty much any camera beyond a cell phone camera makes night sky/Milky Way photography something you can do!
- Camera Support. Most people use one of ‘dem three-legged thangs that the camera sets atop… also known as a TRIPOD. But if you don’t have one, NBD friend! (NBD = no big deal). You can literally use ANYTHING to prop the camera in place. A blanket or towel, a bag of rice, a backpack… or you could duct tape the camera to a rock. Whatever… the only requirement is that the camera is perfectly stationary- no wiggles, no vibrations, no jostling about.
- Trigger. Along with the camera, and something to hold the camera pointed where you want, you need a way to actually TAKE the picture. Wireless remotes are the best, because they allow triggering without ever touching (shaking) the camera. A lot of cameras now have wifi built in, and can be triggered from a smartphone. Wired remotes are good, too- just make sure the cord isn’t bouncing or giggling the camera in any way. No remote? NBD! About every camera ever made has a self-timer mode. Using the timer, you can still push the shutter button, but now you have a few seconds of not touching the camera before the picture is actually taken. As long as your “camera support” is half-decent, a typical 10-second timer works fantastic.
And now, for the main course; The RECIPE!
Follow these directions, step-by-step, for a great start in Milky Way photography!
- Setup the camera- Shooting with the camera in MANUAL mode is generally best for this… but don’t be intimidated. Even if you have *NO IDEA* what f-stop or shutter speed or ISO means. Until you do, just stick to the recipe…
1a. Set the aperture wide open. That means the smallest f/stop number you can dial in. That might be 5.6, or 2.8, or maybe higher/lower depending on your camera and lens. If you have multiple lenses and a DSLR, a lens that has a nice wide aperture- lower aperture number- lets in more light and is therefore better for night photography. A $100 “nifty fifty” 50mm lens with f/1.8 can work very well. If you’re using a point-and-shoot, it is what it is, and that’s alright! Just set it as wide as it’ll go.
1b. Set your shutter speed to 30 seconds. Most cameras don’t let you directly dial in a longer shutter than 30 seconds, which is just fine because even at 30 seconds you’re going to get some slight “star trails” due to the Earth’s rotation while the camera’s shutter is open. For starting out, 30 seconds is acceptable- and depending on what gear you’re using, letting more light in at the cost of a little bit of trails can be a worthwhile compromise. For my art prints I like to stay at more like 20 seconds so I get a nice sharp point for each star… but that’s using a higher end camera and a lens that lets a lot of light in.
1c. Set your ISO – a setting that adjusts your camera’s sensitivity to light- to AUTO. Yes, I recommended shooting in manual, and yes, I did just recommend auto for ISO. Lemme ‘splain: Some cameras have great big sensors that are really sensitive to light, some cameras have really small sensors that are not. Some lenses let in a lot of light (low f/stop value), but some do not (f/5.6 and higher values). We know we want the lens letting as much light in as it’s able… and we know a general shutter speed limit before the stars get so streaky that the Milky Way is hard to distinguish. So all that’s left is the ISO setting to control exposure- as in how light or dark the photo is. The higher the ISO value, the brighter the captured image… but at the cost of more “noise” (speckles and graininess). Since we know where we want the other two values set, ISO kind of just needs to be wherever it needs to be for your setup. C’est la vie… let the camera guess at it, and you can raise or lower after you take a shot or two and see how they look.
1d. Connect your remote, or set the camera to it’s self-timer mode, so that you can snap your picture without camera shake. - Frame your shot. Figure out what will be in your picture, and set up your tripod (or misc “support”).
- Focus. Once you’re really concentrating… realize I mean focus the camera! If you’re including a foreground subject, you may be able to use autofocus… but autofocus struggles in low-light, and there are some other issues that can come up in this type of shooting. Setting the camera to MANUAL focus is way better. If there is a foreground point of interest, don’t be too close to it- the more you pull the focus in closer, the more the stars and Milky Way blur and soften. If the foreground isn’t super critical, or isn’t super detailed, I prefer/recommend to set focus on the stars themselves. Using the camera’s LCD screen (so using “live view” on a DSLR), zoom in on the digital preview as much as the camera will allow, and THEN adjust focus. To focus on the stars, zoom the image on a star somewhere around the middle of the image, and adjust focus until it’s the tiniest, brightest dot you can get it. Done deal!
- Fire away! Maybe it’s just me, but 20-30 seconds feels like an unusually long bit of time as I’m waiting to see how the photo looks in the camera! With experience there can be less trial-and-error, but when just starting out you might shoot some additional images with the “exposure compensation” up (+1 or +2, resulting in brighter images) or down (probably won’t need more than -1 before the image is too dark to be any kind of useful). With many camera setups, it can be better to capture the image a bit brighter than what the auto exposure (auto ISO) determines… even if it looks a bit brighter on the camera screen than what you want your final image to look like. Even though higher ISO means more noise in your image, it also means greater sensitivity to light, and that can mean picking up the stars better, or picking up more of the distant/faint stars. So with many cameras, an image that appears slightly too bright can be brought back down again when you develop it later, giving you a more impressive Milky Way than the image that was shot at the “right” exposure all along. Just don’t over-do it…
- Sip your favorite beverage of choice, ’cause you be done. Yes, the sip is important. Without the sip, this wouldn’t be “5 easy steps”. And there were just a couple things to know up front. It can seem intimidating… but really, anyone can do it! Not to take away from myself, or those that specialize in this specifically (and do it better than I do). It’s like most things in life, the more you learn, the more you realize there is to learn. Improvement becomes incremental, and to be honest a lot of people won’t see or appreciate the differences if you’re just sharing them on social media.
Night sky photography of the stars and Milky Way can be a lot of fun, produce really fascinating images, and leave you- the shooter- with a very rewarding feeling of accomplishment. I really dig it, and that’s why I’m sharing this guide to experiencing this for yourself.
Left out of this how-to is processing and developing your images… which again is a whole topic in itself, best tackled in another post. But, like capturing, it doesn’t have to be as complicated or difficult as it may seem… a little playing around and trying some things and you’ll soon have your new night sky images looking nice enough to show off proudly!
And… since I am running a business here… before wrapping up I’ll mention that if you have a very particular night sky image- or something important to you that would look great when beautifully captured beneath the night sky- we’re your go-to artistic adventure photographers, serving the Hudson Valley and beyond. Custom framed prints or art canvas wall hangers look amazing in your home, and they make great gifts, too!
Thanks for reading along, and we really hope you found this article helpful and inspiring. If you did, please consider giving it a share… and stay tuned for more content, as well as information about some upcoming photo meet-ups where we’ll get together to shoot and will freely share tips and guidance to up your photo game! ‘Till then, Cheers!
-Ryan Voight | SUNDOG Productions